


已经在 Centos 6,7,9 上配置 Google Auth MFA 并测试成功,本文以 Centos 7 演示
下载所需文件(建议阿里源)
wget -O /etc/yum.repos.d/CentOS-Base.repo https://mirrors.aliyun.com/repo/Centos-7.repo
依赖包 x 2
libtool-ltdl-2.4.2-22.el7_3.x86_64.rpm
oath-toolkit-2.6.1.tar.gz
Google 验证器 x 1
google-authenticator-libpam-1.07.tar.gz
前置准备:
1.手机上安装 Google 的 Authenticator 用来获取与之匹配的 6 位验证码, 该APP可以不依赖 Google Play 从网页下载安装
2.配置好时间同步,与手机时间一致
3.关闭 centos 7 的 selinux
先安装依赖包
# rpm -ivh libtool-ltdl-2.2.6-15.5.el6.x86_64.rpm
# yum -y install pam-devel-1.1.1-24.el6.x86_64
检查安装结果
# rpm -qa | grep -E "pam-devel|libtool-ltdl"
pam-devel-1.1.8-23.el7.x86_64
libtool-ltdl-2.4.2-22.el7_3.x86_64
安装 C 编译库
# yum -y install gcc make glibc-devel
安装 Google 验证器所需要的模组
# tar -zxvf oath-toolkit-2.6.1.tar.gz
# cd oath-toolkit-2.6.1
# ./configure --prefix=/usr --libdir=/usr/lib64 --disable-static
# make && make install
检查安装结果
# ls /usr/lib64/liboath.so*
/usr/lib64/liboath.so  /usr/lib64/liboath.so.0  /usr/lib64/liboath.so.0.1.3
安装 Google 验证器
# tar -zxvf google-authenticator-libpam-1.07.tar.gz
# cd google-authenticator-libpam-1.07
# yum install -y autoconf automake libtool
# ./bootstrap.sh
#./configure --prefix=/usr --libdir=/usr/lib64/security CFLAGS="-I/usr/include" LDFLAGS="-L/usr/lib64 -loath"
# make && make install
正常的工作目录为 /usr/lib64/security/, 需要手动移动文件
# mv -f /usr/lib64/security/security/pam_google_authenticator.so /usr/lib64/security/
确认文件存在
# ls -l /usr/lib64/security/pam_google_authenticator.so
-rwxr-xr-x 1 root root 45711 Feb 15 00:02 /usr/lib64/security/pam_google_authenticator.so
重置模块权限
# chmod 755 /usr/lib64/security/pam_google_authenticator.so
配置 /etc/ssh/sshd_config 文件,修改以下内容:
PasswordAuthentication no
ChallengeResponseAuthentication yes
GSSAPIAuthentication no
GSSAPICleanupCredentials no
UsePAM yes
KbdInteractiveAuthentication no
修改 /etc/pam.d/sshd 改成以下内容:
表示先验证密码,再验证Google 验证码
注意: 第三行的 nullok 表示如果账号未配置 google 验证器,则可以不输入验证码登录成功
#%PAM-1.0
auth       required     pam_unix.so
auth       required     pam_google_authenticator.so secret=/home/${USER}/.google_authenticator nullok
account    required     pam_unix.so
session    required     pam_loginuid.so
session    optional     pam_keyinit.so force revok
session    include      password-auth
auth       substack     password-auth
测试验证
建立账号 test 并测试密码
先以 test 账号登录
配置当前账号的 google 验证器
$ google-authenticator
依次输入:
yes 回车
拍下二维码, 或者记录 Your new secret key is: B7SAYLKFWGC4QQLM2SFSVXD6DE 这一行,导入到手机 Authentictor 基于时间的验证, 这里可以输入 -1 回车继续 ,也可以用手机的APP导入密钥后直接验证 6 位验证码后回车.
再输入 4个 yes 回车
配置完成
重启 sshd 服务
用 test 重新登录
执行 ssh test@192.168.1.100 (本文用 x-shell 演示,必须配置 session 密码留空,否则会验证失败)
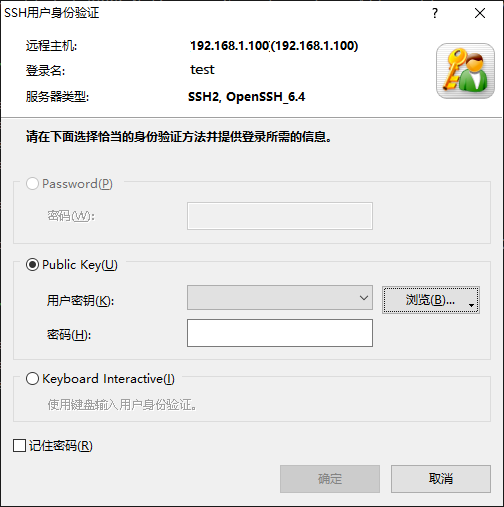
先点选到 Keyboard Interactive(I), 点确定
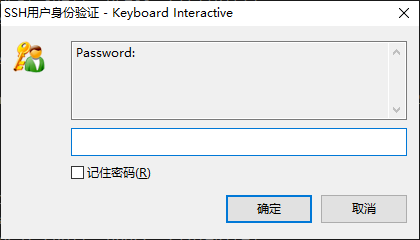
先输入 test 的密码,点确定
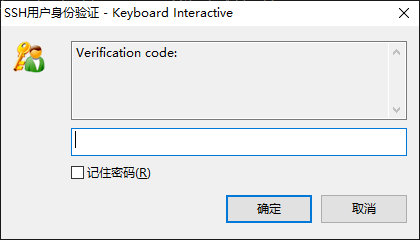
再输入手机刚才输入 test 账号的密钥对应的 6 位验证码 即可登录成功.
如果未登录成功,则检查 log 文件 /var/etc/secure





 扫一扫
扫一扫


 346
346

 被折叠的 条评论
为什么被折叠?
被折叠的 条评论
为什么被折叠?
 到【灌水乐园】发言





