



 本文详细介绍了如何使用gSOAP工具搭建SOAP服务的过程,包括下载源码、编译安装、生成接口代码及测试等步骤,并提供了客户端和服务端的示例代码。
1.下载源码。
2.编译安装。
3.测试。
1.下载源码。
直接网上下载最新的源码即可。
https://sourceforge.net/projects/gsoap2
我下载到的是2.8.111的源码。
解压后是

2.编译安装。
这个比较简单,编译安装三步走。
./configure
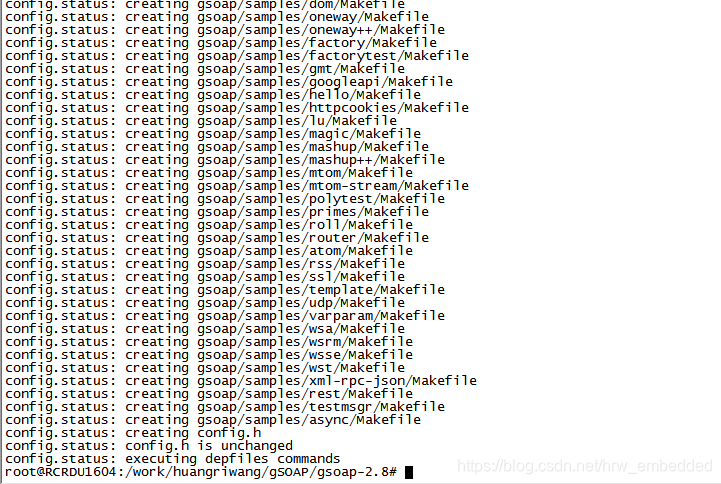
make
一般没有出错即可。
make install
安装成功会把相应的程序安装到当前系统。


到这里,我们开发SOAP的两个工具(wsdl2h、soapcpp2)已经安装成功。
3.测试。
这里我们有一个客户提供的一个wsdl文件,现在我们就通过这个文件来生成相应代码。
首先生成通道wsdl2h 程序生成*.h文件。命令如下
wsdl2h -o FSUService.h ./FSUService.wsdl
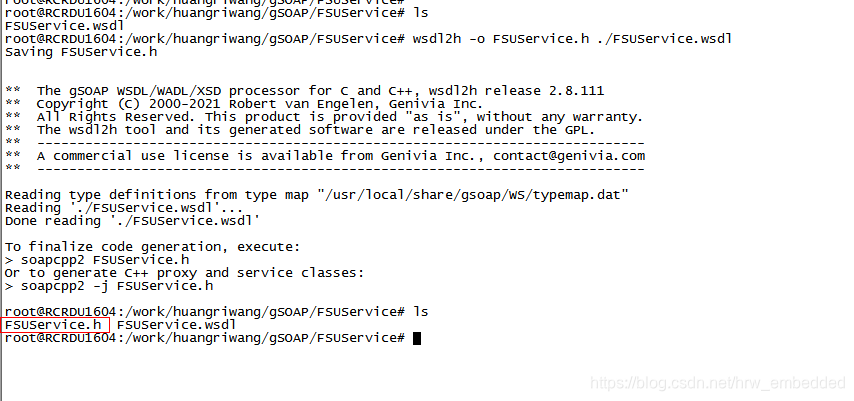
到这里没有什么问题的话应该会生成一个FSUService.h文件,接下来我们来生成客户端接口代码和服务器接口代码,执行如下命令
soapcpp2 -i -Iimport FSUService.h
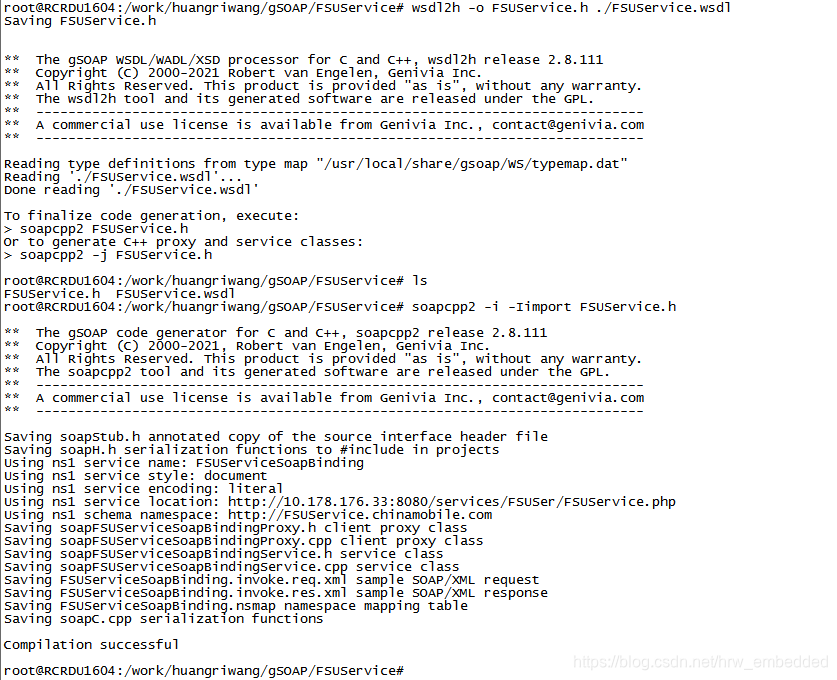
提示成功就可以看到生成的代码了。

到这里,目前生成的都是接口代码,这个需要写相应的执行代码才行。
客户端代码
client.cpp
#include "soapFSUServiceSoapBindingProxy.h"/*包含接口代码里面客户端代码*/
#include "FSUServiceSoapBinding.nsmap"/*包含接口代码里面对应的nsmap文件*/

/*以下是服务器地址*/
const char server[] = "http://172.16.89.202:82/services/FSUSer/FSUService.php?wsdl";
const char server2[] = "http://172.16.89.117:8080";

int main(int argc, char **argv)
{
	std::string str1,result;
  FSUServiceSoapBindingProxy test;
  //test.soap_endpoint = server;
  test.soap_endpoint = server2;
	str1 += "<?xml version=\"1.0\" encoding=\"UTF-8\"?><Request><PK_Type><Name>LOGIN</Name></PK_Type><Info><UserName>admin</UserName><PassWord>21232f297a57a5a743894a0e4a801fc3</PassWord><FSUID>26201907030001</FSUID><FSUIP>172.16.88.192</FSUIP><FSUMAC>00-0c-29-de-4c-58</FSUMAC><FSUVER>1.0.01</FSUVER></Info></Request>";
  test.invoke(str1, result);

  if (test.error)
    test.soap_stream_fault(std::cerr);
	else
	{
		printf("client test\r\n");
		std::cout <<	result << std::endl;
	}

  test.destroy(); /* clean up mem */
  return 0;
}

server.cpp

#include "soapFSUServiceSoapBindingService.h"/*包含接口代码里面服务端代码*/
#include "FSUServiceSoapBinding.nsmap"/*包含接口代码里面对应的nsmap文件*/

int main(int argc, char **argv)
{
  FSUServiceSoapBindingService test;
  if (argc < 2)
    test.serve();	/* serve as CGI application */
  else
  {
    int port = atoi(argv[1]);
    if (!port)
    {
      fprintf(stderr, "Usage: FSUService++ <port>\n");
      exit(0);
    }
    /* run iterative server on port until fatal error */
    if (test.run(port))
    {
      test.soap_stream_fault(std::cerr);
      exit(1);
    }
  }
  return 0;
}
``

/*实现一下wsdl文件里面的接口*/
int FSUServiceSoapBindingService::invoke(const std::string& _xmlData, std::string &_invokeReturn)
{
  printf("FSUServiceSoapBindingService::invoke");
  _invokeReturn += "FSUServiceSoapBindingService::invoke";
  return SOAP_OK;
}
到这里客户端和服务器测试代码写完。
进行编译之前开需要拷贝一个文件到工程里面,就是gsoap里面的stdsoap2.cpp文件
路径是gsoap-2.8/gsoap/stdsoap2.cpp
到到这里代码已经全部处理完毕,编译客户端和服务器代码。
g++ -o client client.cpp soapC.cpp soapFSUServiceSoapBindingProxy.cpp stdsoap2.cpp
g++ -o server server.cpp soapC.cpp soapFSUServiceSoapBindingService.cpp stdsoap2.cpp
编译一般没有报错也没有警告

执行测试,先开服务器。

再多一个终端执行客户端程序

执行了客户端后,能得到服务器返回的字符串即可。
到这里测试通过。
关于gSOAP工具的应用可以参考博客
https://www.cnblogs.com/hgwang/p/5840265.html
测试环境是Ubuntu1604,其他环境如果出错根据实际情况来处理,步骤也是这些。
本机测试虽然已经通过了,但还需要放到arm板测试。C++的代码,直接换编译机编译既可。
arm-linux-g++ -o client client.cpp soapC.cpp soapFSUServiceSoapBindingProxy.cpp stdsoap2.cpp
编译的时候会找不到头文件(stdsoap2.h),因为我用的编译服务器没有安装gSOAP组件,安装需要处理权限,这里不安装,直接去拷贝gsoap源码里面的gsoap-2.8/gsoap/stdsoap2.h既可
再编译既可通过
编译服务器。
arm-linux-g++ -o server server.cpp soapC.cpp soapFSUServiceSoapBindingService.cpp stdsoap2.cpp
开发过程问题整理:
一、测试过程中出现执行报
[root@NMIVV2 FSUService]# ./server 8080
./server: line 4: syntax error: unexpected word (expecting “)”)
这个是编译器错误导致的,拷贝命令的时候Linux x86的编译器没有成功替换为arm-linux-g++,这个编译是通过的,用file命令查看文件属性发现的。
二、通过网页访问SOAP服务的时候报
  <?xml version="1.0" encoding="UTF-8" ?>
- <SOAP-ENV:Envelope xmlns:SOAP-ENV="http://schemas.xmlsoap.org/soap/envelope/" xmlns:SOAP-ENC="http://schemas.xmlsoap.org/soap/encoding/" xmlns:xsi="http://www.w3.org/2001/XMLSchema-instance" xmlns:xsd="http://www.w3.org/2001/XMLSchema" xmlns:tmsc="urn:tmsc">
- <SOAP-ENV:Body>
- <SOAP-ENV:Fault SOAP-ENV:encodingStyle="http://schemas.xmlsoap.org/soap/encoding/">
  <faultcode>SOAP-ENV:Client</faultcode>
  <faultstring>HTTP GET method not implemented</faultstring>
  </SOAP-ENV:Fault>
  </SOAP-ENV:Body>
  </SOAP-ENV:Envelope>
这个是没有实现http_get(struct soap *soap)导致的,找到生成的stdsoap2.cpp,找到里面的http_get(struct soap *soap)函数,在
DBGLOG(TEST, SOAP_MESSAGE(fdebug, "HTTP GET request\n"));
后面增加如下代码
FILE*fd = NULL;
fd = fopen("FSUService.wsdl", "rb"); //open WSDL file to copy
if (!fd)
{
	return 404; //return HTTP not found error
}
soap->http_content = "text/xml";  //HTTP header with text /xml content
soap_response(soap,SOAP_FILE);
for(;;)
{
	size_t r = fread(soap->tmpbuf,1, sizeof(soap->tmpbuf), fd);
	if (!r)
	{
		break;
	}
	if (soap_send_raw(soap, soap->tmpbuf, r))
	{
		break; //cannot send, but little we can do about that
	}
}
fclose(fd);
soap_end_send(soap);
return SOAP_OK;

  //return SOAP_GET_METHOD;//原来的返回也需要屏蔽或者删除
改好重新编译执行,再访问就可以了,这个问题困扰了好一会儿,看到别人写的博文给的思路,https://www.cnblogs.com/Laokong-ServiceStation/archive/2011/04/29/2032331.html
测试结果:
Ubuntu虚拟机执行服务器,arm板执行客户端请求成功。
arm板执行服务器,Ubuntu虚拟机执行客户端请求成功。





 扫一扫
扫一扫


 被折叠的 条评论
为什么被折叠?
被折叠的 条评论
为什么被折叠?
 到【灌水乐园】发言





