Microservices architecture allows applications to be divided into smaller, independent services. These services often need to communicate with each other to exchange data and trigger business processes. RabbitMQ is an open-source message broker that implements the Advanced Message Queuing Protocol (AMQP). It receives messages from producers and routes them to the appropriate consumers through exchanges and queues.
- Asynchronous Communication: Services can communicate without waiting for immediate responses.
- Loose Coupling: Producers and consumers remain independent of each other.
- Reliable Message Delivery: Messages are stored safely until they are successfully processed.
RabbitMQ Communication Flow in Microservices
Producer Publishes a Message
- The producer service creates a message whenever a business event occurs and sends it to a RabbitMQ Exchange instead of communicating directly with the consumer service.
- The producer only knows the exchange name and routing key; it does not need any information about the consumer services.
RabbitMQ Exchange Receives the Message
- The Exchange acts as a message router. It receives the message from the producer and decides where to forward it based on the exchange type and routing key.
- RabbitMQ supports multiple exchange types such as Direct, Topic, Fanout, and Headers exchanges for different routing strategies.
Exchange Routes the Message to the Appropriate Queue
- Using predefined bindings and routing keys, the Exchange forwards the message to one or more queues that match the routing rules.
- A single message can be routed to multiple queues depending on the exchange configuration and bindings.
Queue Stores the Message
- The queue temporarily stores the message until a consumer service is available to process it, ensuring reliable and asynchronous communication.
- If the consumer service is temporarily unavailable, RabbitMQ retains the message until it can be successfully delivered.
Consumer Reads and Processes the Message
- The consumer service listens to the queue, receives the message, processes the business logic, and completes the required operation independently
- Multiple consumer instances can listen to the same queue, enabling load balancing and horizontal scalability.
Implementation of the Microservices Communication with RabbitMQ
Below is the implementation of the Microservices Communication with RabbitMQ.
First Set up the RabbitMQ
We can download RabbitMQ using this link after that, install and run RabbitMQ locally on the computer system.
run the rabbitmq:
rabbitmq-plugins.bat enable rabbitmq_management
Refer the below cmd plugins:
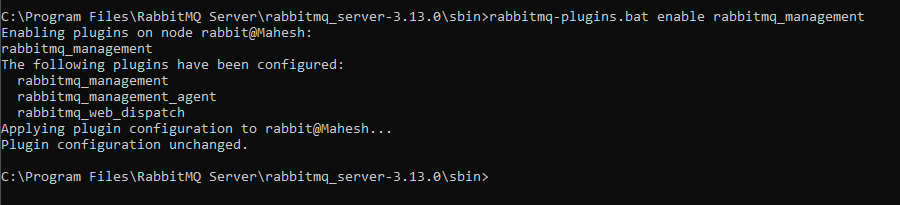
Once the above command is run, RabbitMQ will be running on the local system at port number 15672. The default username and password are "guest."
.png)
In this implementation, we will create two microservices:
- Producer Service
- Consumer Service
Create the Producer-service
Below are the steps to create the producer service.
Step 1: Create Spring Boot Project
Create a new Spring Boot project using Spring Initializr, and include the following dependencies:
- Spring Web
- Spring for RabbitMQ
- Lombok
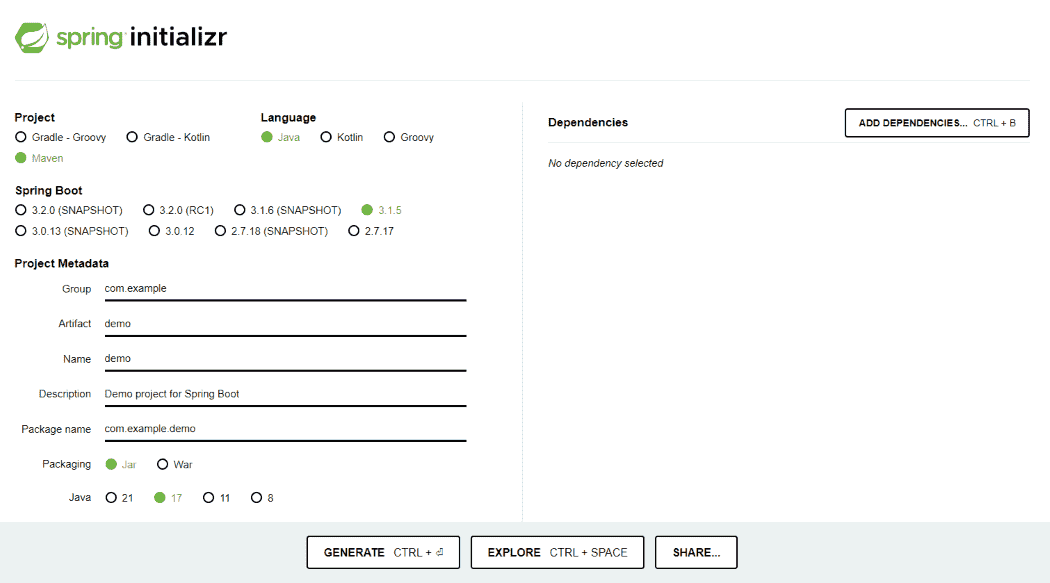
Once the project is created, the file structure will resemble the image below.
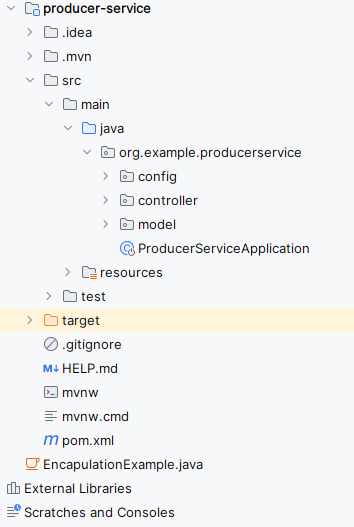
Step 2: Review the Generated pom.xml File.
The generated pom.xml file should contain the Following Dependency
<project xmlns="http://maven.apache.org/POM/4.0.0"
         xmlns:xsi="http://www.w3.org/2001/XMLSchema-instance"
         xsi:schemaLocation="http://maven.apache.org/POM/4.0.0
         http://maven.apache.org/xsd/maven-4.0.0.xsd">

    <modelVersion>4.0.0</modelVersion>

    <parent>
        <groupId>org.springframework.boot</groupId>
        <artifactId>spring-boot-starter-parent</artifactId>
        <version>3.2.5</version>
        <relativePath/>
    </parent>

    <groupId>com.example</groupId>
    <artifactId>producer-service</artifactId>
    <version>0.0.1-SNAPSHOT</version>
    <name>producer-service</name>

    <properties>
        <java.version>17</java.version>
    </properties>

    <dependencies>

        <!-- Spring Web -->
        <dependency>
            <groupId>org.springframework.boot</groupId>
            <artifactId>spring-boot-starter-web</artifactId>
        </dependency>

        <!-- RabbitMQ -->
        <dependency>
            <groupId>org.springframework.boot</groupId>
            <artifactId>spring-boot-starter-amqp</artifactId>
        </dependency>

        <!-- Lombok -->
        <dependency>
            <groupId>org.projectlombok</groupId>
            <artifactId>lombok</artifactId>
            <optional>true</optional>
        </dependency>

        <!-- DevTools -->
        <dependency>
            <groupId>org.springframework.boot</groupId>
            <artifactId>spring-boot-devtools</artifactId>
            <scope>runtime</scope>
            <optional>true</optional>
        </dependency>

        <!-- Testing -->
        <dependency>
            <groupId>org.springframework.boot</groupId>
            <artifactId>spring-boot-starter-test</artifactId>
            <scope>test</scope>
        </dependency>

    </dependencies>

    <build>
        <plugins>

            <plugin>
                <groupId>org.springframework.boot</groupId>
                <artifactId>spring-boot-maven-plugin</artifactId>

                <configuration>
                    <excludes>
                        <exclude>
                            <groupId>org.projectlombok</groupId>
                            <artifactId>lombok</artifactId>
                        </exclude>
                    </excludes>
                </configuration>

            </plugin>

        </plugins>
    </build>

</project>
Step 3: Configure RabbitMQ Properties
Add the following properties in application.properties.
spring.application.name=producer-service
# RabbitMQ Config
spring.rabbitmq.host=localhost
spring.rabbitmq.port=5672
spring.rabbitmq.username=guest
spring.rabbitmq.password=guest
spring.rabbitmq.queue=my-queue
spring.rabbitmq.exchange=my-exchange
spring.rabbitmq.routingkey=my-routingkey
spring.main.allow-bean-definition-overriding=true
Step 4: Create Message Model class
This class represents the message payload exchanged between microservices.
package org.example.producerservice.model;

import lombok.Data;

@Data
public class Message {

    private String content;
    private String sender;

    public Message() {
    }

    public Message(String content, String sender) {
        this.content = content;
        this.sender = sender;
    }

    public String getContent() {
        return content;
    }

    public void setContent(String content) {
        this.content = content;
    }

    public String getSender() {
        return sender;
    }

    public void setSender(String sender) {
        this.sender = sender;
    }

    @Override
    public String toString() {
        return "Message{" +
                "content='" + content + '\'' +
                ", sender='" + sender + '\'' +
                '}';
    }
}
Step 5: Create RabbitMQ Configuration
This configuration creates the queue, exchange, binding, and JSON message converter.
package org.example.producerservice.config;


import org.springframework.amqp.core.*;
import org.springframework.amqp.rabbit.connection.ConnectionFactory;
import org.springframework.amqp.rabbit.core.RabbitTemplate;
import org.springframework.amqp.support.converter.Jackson2JsonMessageConverter;
import org.springframework.amqp.support.converter.MessageConverter;
import org.springframework.beans.factory.annotation.Value;
import org.springframework.context.annotation.Bean;
import org.springframework.context.annotation.Configuration;

@Configuration
public class RabbitMQConfig {

    @Value("${spring.rabbitmq.queue}")
    private String queueName;

    @Value("${spring.rabbitmq.exchange}")
    private String exchange;


    @Bean
    public Queue queue() {
        return new Queue(queueName, false);
    }

    @Bean
    public TopicExchange exchange() {
        return new TopicExchange(exchange);
    }

    @Bean
    public Binding binding(Queue queue, TopicExchange exchange) {
        return BindingBuilder.bind(queue).to(exchange).with(queueName);
    }

    @Bean
    public MessageConverter jsonMessageConverter() {
        return new Jackson2JsonMessageConverter();
    }

    @Bean
    public AmqpTemplate rabbitTemplate(ConnectionFactory connectionFactory) {
        final RabbitTemplate rabbitTemplate = new RabbitTemplate(connectionFactory);
        rabbitTemplate.setMessageConverter(jsonMessageConverter());
        return rabbitTemplate;
    }
}
Step 6: Create Producer Service
This service publishes messages to RabbitMQ.
package com.example.producer.service;

import com.example.producer.model.Message;
import org.springframework.amqp.rabbit.core.RabbitTemplate;
import org.springframework.beans.factory.annotation.*;
import org.springframework.stereotype.Service;

@Service
public class ProducerService {

    @Autowired
    private RabbitTemplate rabbitTemplate;

    @Value("${rabbitmq.exchange}")
    private String exchange;

    @Value("${rabbitmq.routingkey}")
    private String routingKey;

    public void sendMessage(Message message) {

        rabbitTemplate.convertAndSend(
                exchange,
                routingKey,
                message
        );
    }
}
Step 7: Create REST Controller
This controller exposes an API endpoint for publishing messages.
package org.example.producerservice.controller;
import org.example.producerservice.model.Message;
import org.springframework.amqp.rabbit.core.RabbitTemplate;
import org.springframework.beans.factory.annotation.Autowired;
import org.springframework.beans.factory.annotation.Value;
import org.springframework.web.bind.annotation.PostMapping;
import org.springframework.web.bind.annotation.RequestBody;
import org.springframework.web.bind.annotation.RestController;

import java.util.Map;

@RestController
public class MessageController {

    @Autowired
    private RabbitTemplate rabbitTemplate;

    @Value("${spring.rabbitmq.exchange}")
    private String exchange;

    @Value("${spring.rabbitmq.routingkey}")
    private String routingKey;

    @PostMapping("/send")
    public String sendMessage(@RequestBody Map<String, String> messageBody) {
        String content = messageBody.get("content");
        String sender = messageBody.get("sender");

        Message message = new Message(content, sender);
        rabbitTemplate.convertAndSend(exchange, routingKey, message);

        return "Message sent successfully!";
    }

}
Step 8: Create Main Class
Create ProduceServiceApplication and put the below code.
package org.example.producerservice;

import org.springframework.boot.SpringApplication;
import org.springframework.boot.autoconfigure.SpringBootApplication;

@SpringBootApplication
public class ProducerServiceApplication {

    public static void main(String[] args) {
        SpringApplication.run(ProducerServiceApplication.class, args);
    }

}
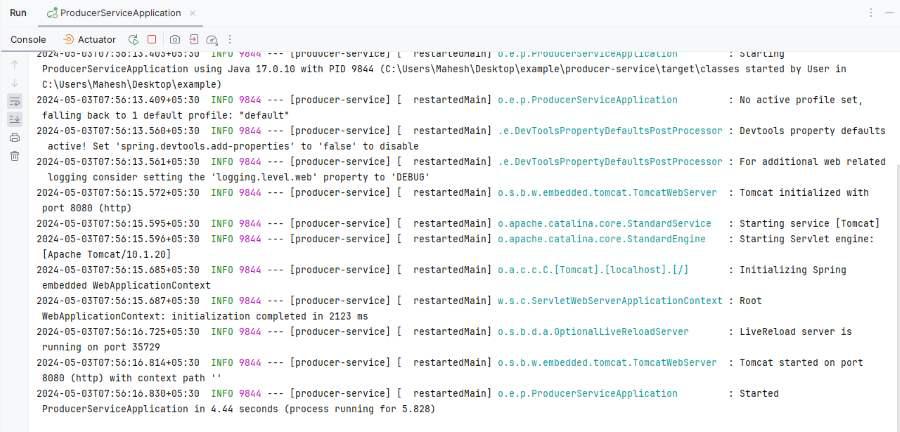
Step 9: Run the application
Once we run the application, then the project will run at port 8080.
Create the Consumer Service
Below are the steps to create the consumer service.
Step 1: Create the Spring Boot Project
Create a new Spring Boot project using Spring Initializr, and include the following dependencies:
- Spring Web
- Spring for RabbitMQ
- Lombok
- Spring Devtools
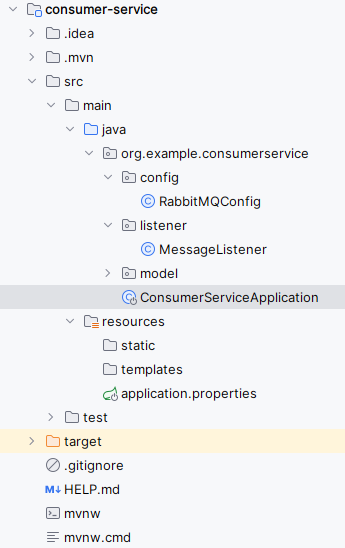
Once the project is created, the file structure will resemble the image below.
Step 2: Review the Generated pom.xml File.
The generated pom.xml file should contain the Following Dependency.
<project xmlns="http://maven.apache.org/POM/4.0.0"
         xmlns:xsi="http://www.w3.org/2001/XMLSchema-instance"
         xsi:schemaLocation="http://maven.apache.org/POM/4.0.0
         http://maven.apache.org/xsd/maven-4.0.0.xsd">

    <modelVersion>4.0.0</modelVersion>

    <parent>
        <groupId>org.springframework.boot</groupId>
        <artifactId>spring-boot-starter-parent</artifactId>
        <version>3.2.5</version>
        <relativePath/>
    </parent>

    <groupId>com.example</groupId>
    <artifactId>consumer-service</artifactId>
    <version>0.0.1-SNAPSHOT</version>
    <name>consumer-service</name>

    <properties>
        <java.version>17</java.version>
    </properties>

    <dependencies>

        <!-- Spring Web -->
        <dependency>
            <groupId>org.springframework.boot</groupId>
            <artifactId>spring-boot-starter-web</artifactId>
        </dependency>

        <!-- RabbitMQ -->
        <dependency>
            <groupId>org.springframework.boot</groupId>
            <artifactId>spring-boot-starter-amqp</artifactId>
        </dependency>

        <!-- Lombok -->
        <dependency>
            <groupId>org.projectlombok</groupId>
            <artifactId>lombok</artifactId>
            <optional>true</optional>
        </dependency>

        <!-- DevTools -->
        <dependency>
            <groupId>org.springframework.boot</groupId>
            <artifactId>spring-boot-devtools</artifactId>
            <scope>runtime</scope>
            <optional>true</optional>
        </dependency>

        <!-- Testing -->
        <dependency>
            <groupId>org.springframework.boot</groupId>
            <artifactId>spring-boot-starter-test</artifactId>
            <scope>test</scope>
        </dependency>

    </dependencies>

    <build>
        <plugins>

            <plugin>
                <groupId>org.springframework.boot</groupId>
                <artifactId>spring-boot-maven-plugin</artifactId>

                <configuration>
                    <excludes>
                        <exclude>
                            <groupId>org.projectlombok</groupId>
                            <artifactId>lombok</artifactId>
                        </exclude>
                    </excludes>
                </configuration>

            </plugin>

        </plugins>
    </build>

</project>
Step 3: Configure RabbitMQ Properties
Open the application.properties file and add the RabbitMQ connection properties to the project.
spring.application.name=consumer-service
server.port=8081
spring.rabbitmq.host=localhost
spring.rabbitmq.port=5672
spring.rabbitmq.username=guest
spring.rabbitmq.password=guest
rabbitmq.queue=my-queue
Step 4: Create Message Model
Create the message model class that represents the structure of the data received from the producer service through RabbitMQ.
package com.example.consumer.model;

import lombok.*;

@Data
@AllArgsConstructor
@NoArgsConstructor
public class Message {

    private String content;
    private String sender;
}
Step 5: Create RabbitMQ Configuration
Configure the RabbitMQ queue, message converter, and listener container required for consuming and deserializing messages.
package com.example.consumer.config;

import org.springframework.amqp.core.Queue;
import org.springframework.amqp.support.converter.*;
import org.springframework.context.annotation.*;
import org.springframework.beans.factory.annotation.Value;

@Configuration
public class RabbitMQConfig {

    @Value("${rabbitmq.queue}")
    private String queue;

    @Bean
    Queue queue() {
        return new Queue(queue);
    }

    @Bean
    MessageConverter converter() {
        return new Jackson2JsonMessageConverter();
    }
}
Step 6: Create Consumer Service
Create a listener component that continuously listens to the configured RabbitMQ queue and processes incoming messages asynchronously.
package com.example.consumer.service;

import com.example.consumer.model.Message;
import org.springframework.amqp.rabbit.annotation.RabbitListener;
import org.springframework.stereotype.Service;

@Service
public class ConsumerService {

    @RabbitListener(queues = "${rabbitmq.queue}")
    public void consumeMessage(
            Message message) {

        System.out.println(
                "Received Message: "
                        + message
        );
    }
}
Step 7: Create Main Class
Create the main Spring Boot application class to bootstrap and start the consumer service.
package org.example.consumerservice;

import org.springframework.boot.SpringApplication;
import org.springframework.boot.autoconfigure.SpringBootApplication;

@SpringBootApplication
public class ConsumerServiceApplication {

    public static void main(String[] args) {
        SpringApplication.run(ConsumerServiceApplication.class, args);

    }
}
Step 8: Run the application
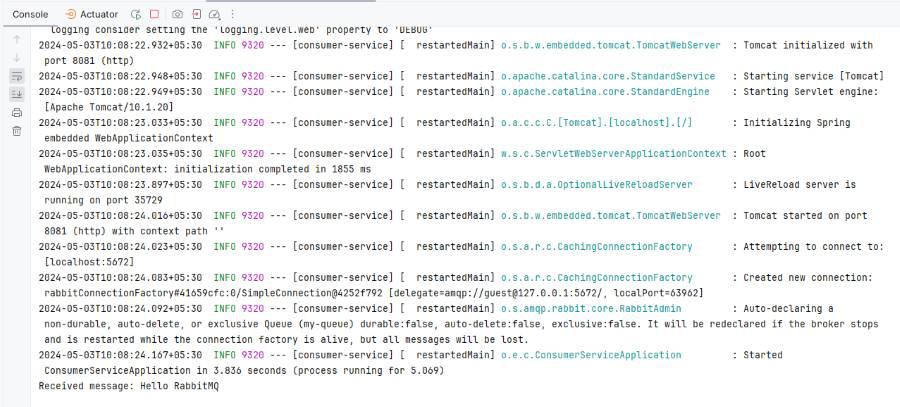
Once we run the application, the project will run on port 8081. We can observe the messages being sent and received in the console.
.jpg)
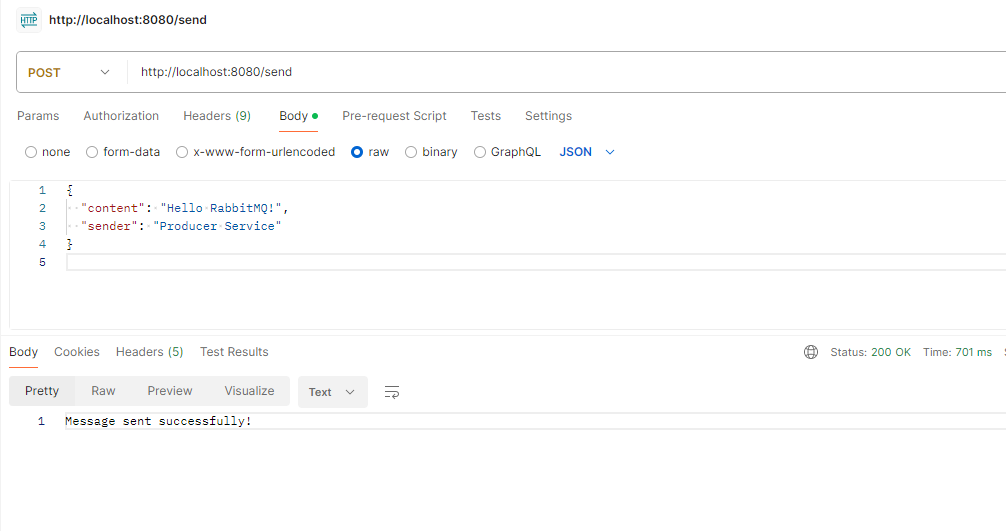
Step 9: Test the API
Send a POST request:
POST http://localhost:8080/send
JSON Body:
{
"content": "Hello RabbitMQ",
"sender:" : "producer-service:}
Output:
Consumer-service receive the message: