
Installing Pandas allows to use its features in Python programs for working with structured data. The installation process is simple and can be done using different package managers depending on your Python environment.
Check if Python is Installed
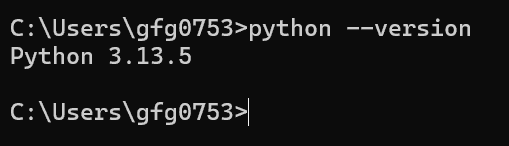
Before installing Pandas, verify that Python is already installed on your system. Open the Command Prompt (Windows) or Terminal (Linux/macOS) and run the following command:
python --version
If Python is already installed, it will generate a message with the Python version available else install Python.
To install Python, you can refer to this: Download and Install Python
Ways to Install Pandas
Python Pandas can be installed on Windows in two ways:
1. Using pip
pip is the default package manager. It downloads the latest available version of the library from the Python Package Index (PyPI) and installs it into your Python environment.
Step 1: Open Command Prompt or Terminal
Open the terminal based on your operating system:
- Windows: Open Command Prompt, PowerShell, or Windows Terminal.
- Linux: Open the Terminal application.
- macOS: Open the Terminal application.
Once the terminal is open, you can use the appropriate pip command to install Pandas.

Step 2: Install Pandas
Run the following command in the Command Prompt or Terminal to install the latest version of Pandas:
pip install pandas

2. Using Anaconda
Anaconda is open-source software that contains Jupyter Notebook, spyder, etc that is used for large data processing, Data Analytics and heavy scientific computing.
To install Anaconda, refer to these articles: For Windows or For Linux.
Step 1: Open Anaconda Navigator
Launch Anaconda Navigator from the Start menu (Windows) or your Applications menu (Linux/macOS).
Step 2: Create or Select an Environment
- Open the Environments tab from the left panel.
- To create a new environment, click Create, enter an environment name, choose the required Python version, and click Create.
- If you already have an environment, simply select it from the list.
This environment will be used to install and manage the Pandas package.

Step 3: Create the Environment
Enter a name for the new environment, select the desired Python version, and click Create.

Step 4: Activate the Environment
After the environment is created, click on it to make it the active environment.

Step 5: Display All Packages
From the package filter dropdown, select All to display every available package.

Step 6: Search for Pandas
Use the search box to find the pandas package in the package list.

Step 7: Select the Pandas Version
Right-click the checkbox next to the pandas package and choose Mark for specific version installation. Select the version you want to install.

Step 8: Install Pandas and Open the Environment
- Click Apply to begin installing the selected version of Pandas.
- After the installation is complete, click the green arrow next to the environment name.
- Choose Open Terminal, Open with Python, or Open with Jupyter Notebook to start working with Pandas.
Import Pandas
After installing Pandas, you need to import it into your Python program before using its features.
import pandas as pd
Explanation:
- Imports the Pandas library into the program and use pd as the standard alias for Pandas.
- After importing the library, you can access its functions using the pd prefix (for example, pd.read_csv() or pd.DataFrame()).
