

A tooltip is a small text box that appears when the user hovers the mouse pointer over a widget. It is commonly used to provide additional information or guidance without taking up extra space in the user interface. In PySide6, tooltips can be added to any widget using the setToolTip() method.
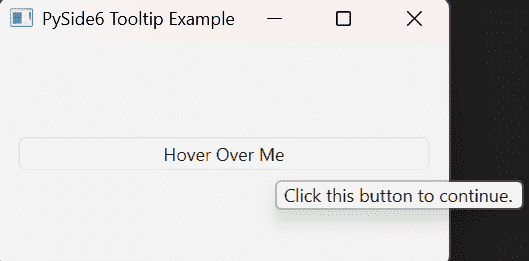
Example: In the example below, a tooltip is displayed when the user hovers the mouse pointer over the button.
import sys
from PySide6.QtWidgets import (QApplication, QWidget, QPushButton, QVBoxLayout)

app = QApplication(sys.argv)

window = QWidget()
window.setWindowTitle("PySide6 Tooltip Example")

button = QPushButton("Hover Over Me")
button.setToolTip("Click this button to continue.")

layout = QVBoxLayout()
layout.addWidget(button)

window.setLayout(layout)
window.resize(300, 150)

window.show()
sys.exit(app.exec())
Output
When the application runs, moving the mouse pointer over the "Hover Over Me" button displays the tooltip "Click this button to continue."
Explanation:
- QPushButton() creates a button widget.
- setToolTip() assigns the tooltip text to the button.
- QVBoxLayout() arranges the button inside the window.
- window.show() displays the application window.
- app.exec() starts the application's event loop.
Syntax
setToolTip() method is used to assign a tooltip to a widget:
widget.setToolTip(text)
- Parameter: text - A string containing the message to display when the mouse pointer hovers over the widget.
- Return Value: setToolTip() method does not return any value. It simply assigns the specified tooltip text to the widget.
Tooltips for Multiple Widgets
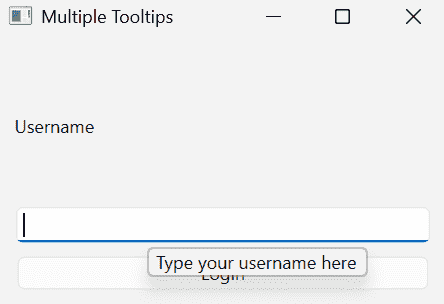
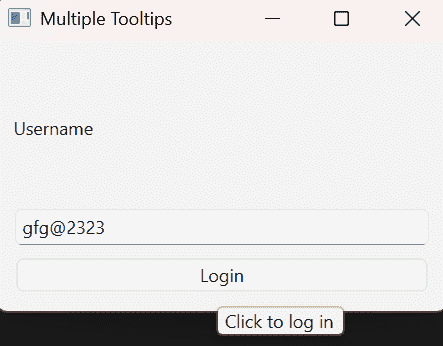
Tooltips can be assigned to multiple widgets in the same application. This helps users understand the purpose of each widget without requiring additional labels or instructions. In the example below, separate tooltips are added to a label, a text box and a button.
import sys
from PySide6.QtWidgets import (QApplication, QWidget, QLabel, QLineEdit, QPushButton, QVBoxLayout)
app = QApplication(sys.argv)

window = QWidget()
window.setWindowTitle("Multiple Tooltips")

label = QLabel("Username")
label.setToolTip("Enter your username")

textbox = QLineEdit()
textbox.setToolTip("Type your username here")

button = QPushButton("Login")
button.setToolTip("Click to log in")

layout = QVBoxLayout()
layout.addWidget(label)
layout.addWidget(textbox)
layout.addWidget(button)

window.setLayout(layout)
window.resize(300, 180)
window.show()
sys.exit(app.exec())
Output
The application displays a label, a text box, and a button. Hovering over each widget shows its corresponding tooltip.
Explanation:
- QLabel() creates a text label.
- QLineEdit() creates a text input field.
- QPushButton() creates a clickable button.
- setToolTip() assigns a different tooltip to each widget.
- QVBoxLayout() arranges all widgets vertically.
Rich Text Tooltips
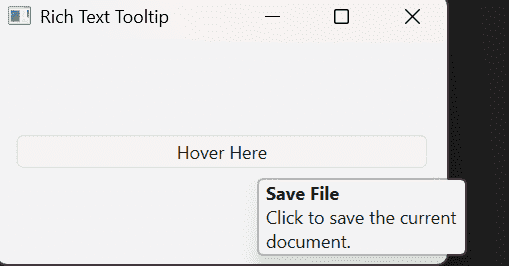
Tooltips in PySide6 support simple HTML formatting. This allows you to display bold text, line breaks, colors, and other formatting to make the tooltip more informative and visually appealing.
import sys
from PySide6.QtWidgets import (QApplication, QWidget, QPushButton, QVBoxLayout)
app = QApplication(sys.argv)

window = QWidget()
window.setWindowTitle("Rich Text Tooltip")
button = QPushButton("Hover Here")

button.setToolTip(
    "<b>Save File</b><br>"
    "Click to save the current document."
)

layout = QVBoxLayout()
layout.addWidget(button)

window.setLayout(layout)
window.resize(300, 150)
window.show()
sys.exit(app.exec())
Output
When the mouse pointer is placed over the button, a tooltip appears with bold text and the description displayed on the next line.
Explanation:
- setToolTip() accepts HTML-formatted text.
- <b> displays bold text.
- <br> inserts a line break inside the tooltip.
- The formatted tooltip provides a cleaner and more informative user experience.
- app.exec() starts the application's event loop.
