Jest is a popular JavaScript testing framework that integrates well with Next.js to simplify unit testing and improve application reliability.
- Enables automated testing of components and application logic.
- Detects issues early during development.
- Improves code quality and maintainability.
- Provides a fast and reliable testing experience.
Steps to Set Up Jest Testing in Next.js
Follow the steps given below:
Step 1: Create a New Next.js Application
npx create-next-app@latest jest-testing-app
cd jest-testing-app
Step 2: Install Jest and Testing Dependencies
npm install --save-dev jest jest-environment-jsdom @testing-library/react @testing-library/jest-domStep 3: Configure Jest
Create a jest.config.js file.
const nextJest = require("next/jest");

const createJestConfig = nextJest({
  dir: "./",
});

const customJestConfig = {
  testEnvironment: "jest-environment-jsdom",
  setupFilesAfterEnv: ["<rootDir>/jest.setup.js"],
};

module.exports = createJestConfig(customJestConfig);
Step 4: Create the Jest Setup File
Create jest.setup.js.
import "@testing-library/jest-dom";Step 5: Update package.json
"scripts": {
  "test": "jest"
}
Folder Structure:
jest-testing-app
│
├── app
│   └── page.js
├── components
├── __tests__
│   └── Button.test.js
├── jest.config.js
├── jest.setup.js
├── public
└── package.json
Step 6: Create a Test Case
const Button = ({ label }) => {
    return <button>{label}</button>;
};

export default Button;
import { render, screen } from "@testing-library/react";
import Button from "../components/Button";

describe("Button Component", () => {
  test("renders button text", () => {
    render(<Button label="Click Me" />);

    expect(
      screen.getByText("Click Me")
    ).toBeInTheDocument();
  });
});
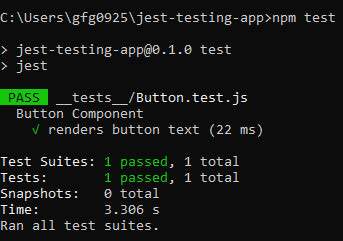
Step 7: Run the Tests
npm testOutput: