


 本文详细介绍了如何在Spring Boot项目中整合Redis,并对比了Jedis和Lettuce两种客户端库的特点,最后通过代码示例展示了如何使用Spring Data Redis进行基本的CRUD操作。
spring-boot整合Redis
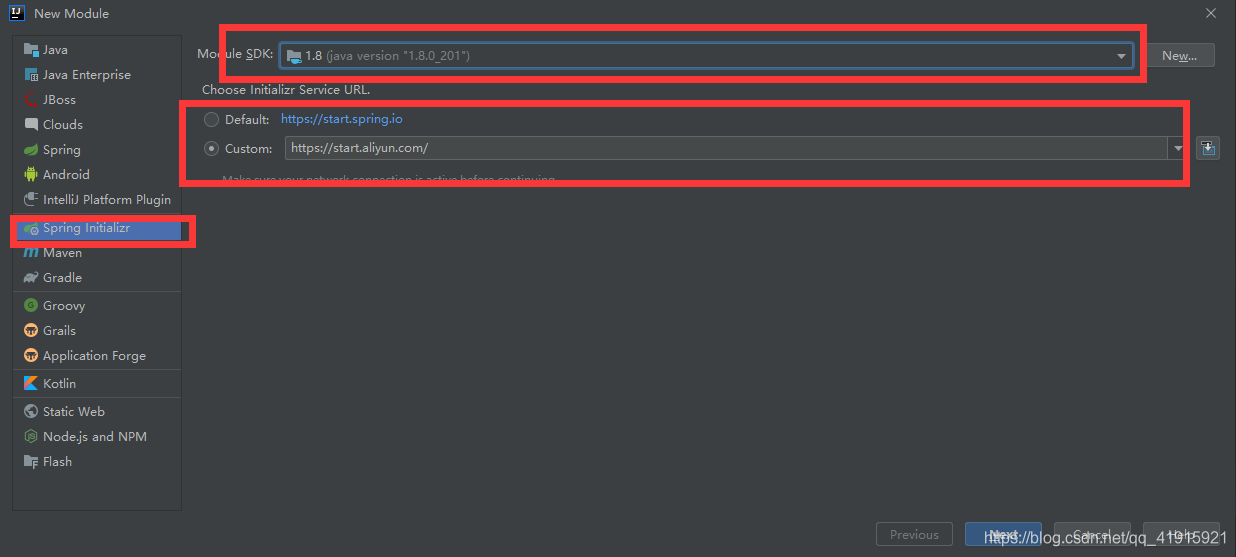
1、新建一个springboot的项目,我们选择官方脚手架工具进行创建,这里不用默认的官网,选择https://start.aliyun.com/ 创建非常快。JDK版本选择好后 Next
2、这里写好项目名和包名后点击 Next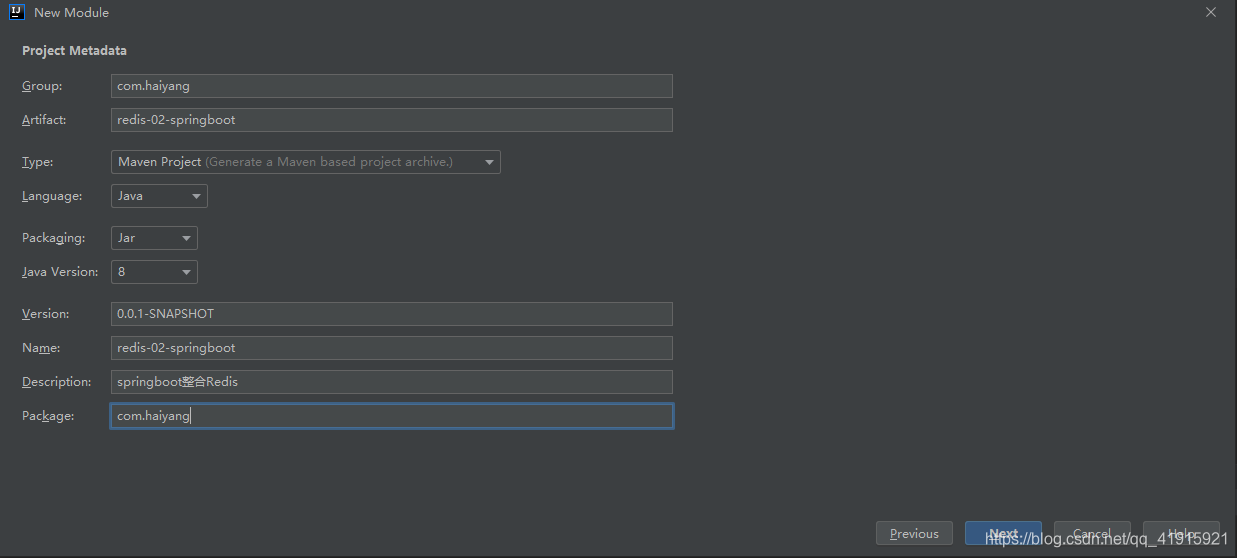
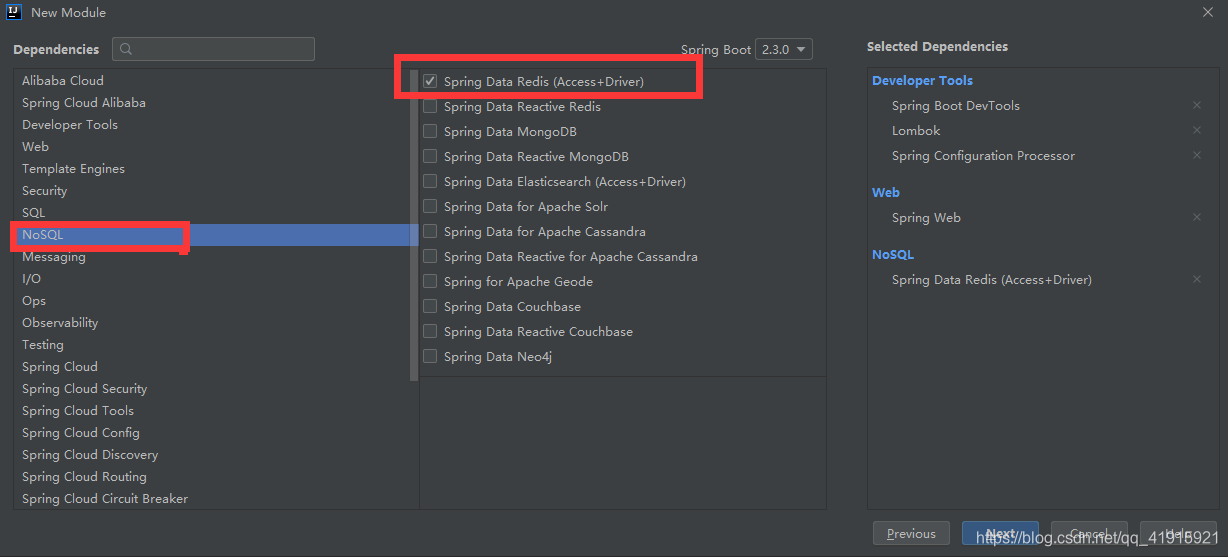
3、这里将常用的依赖打勾
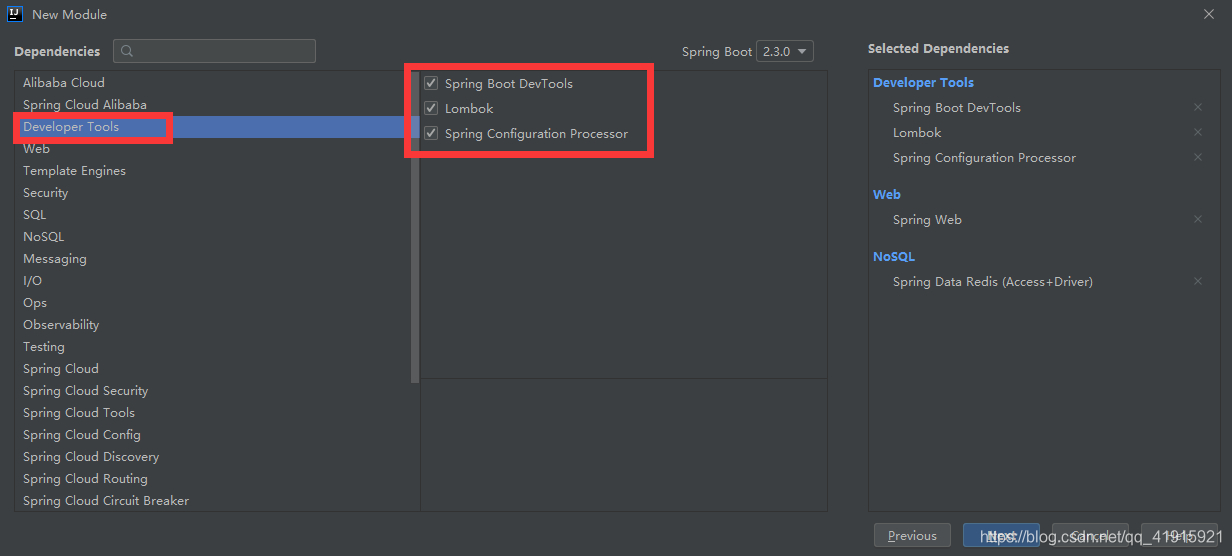
4、这里也是
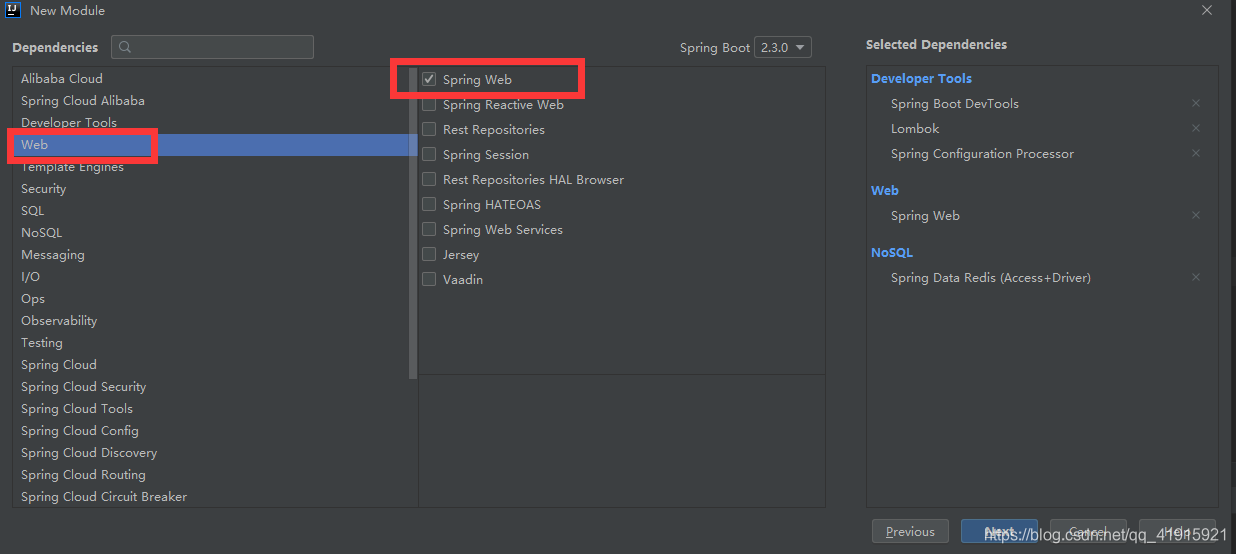
5、这里也是 勾完后点击next
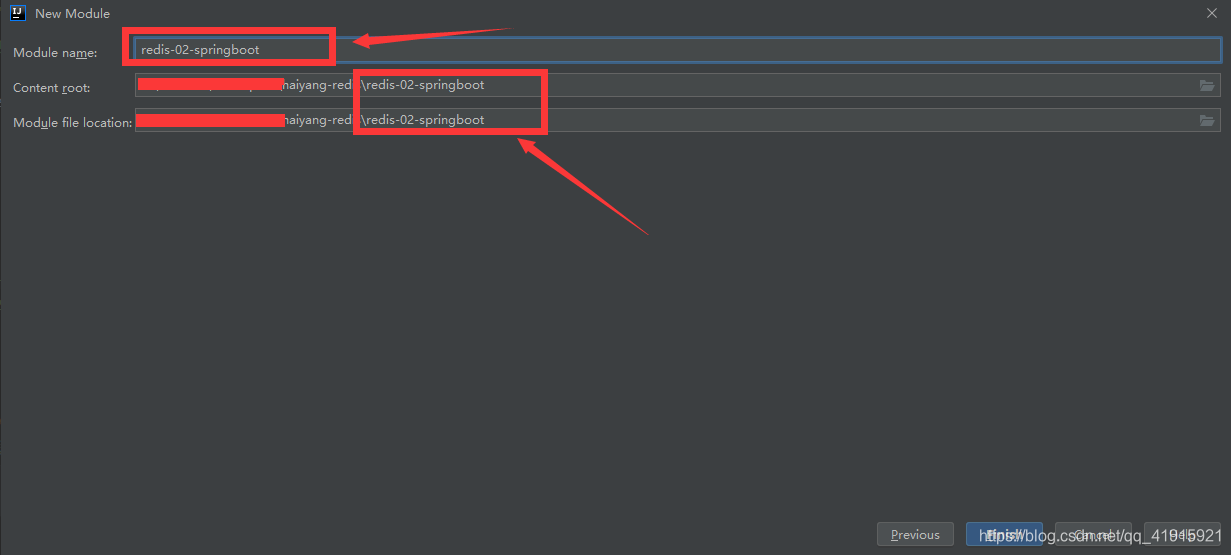
6、如果下图两个地方不一样,记得改成一样的,点击finish
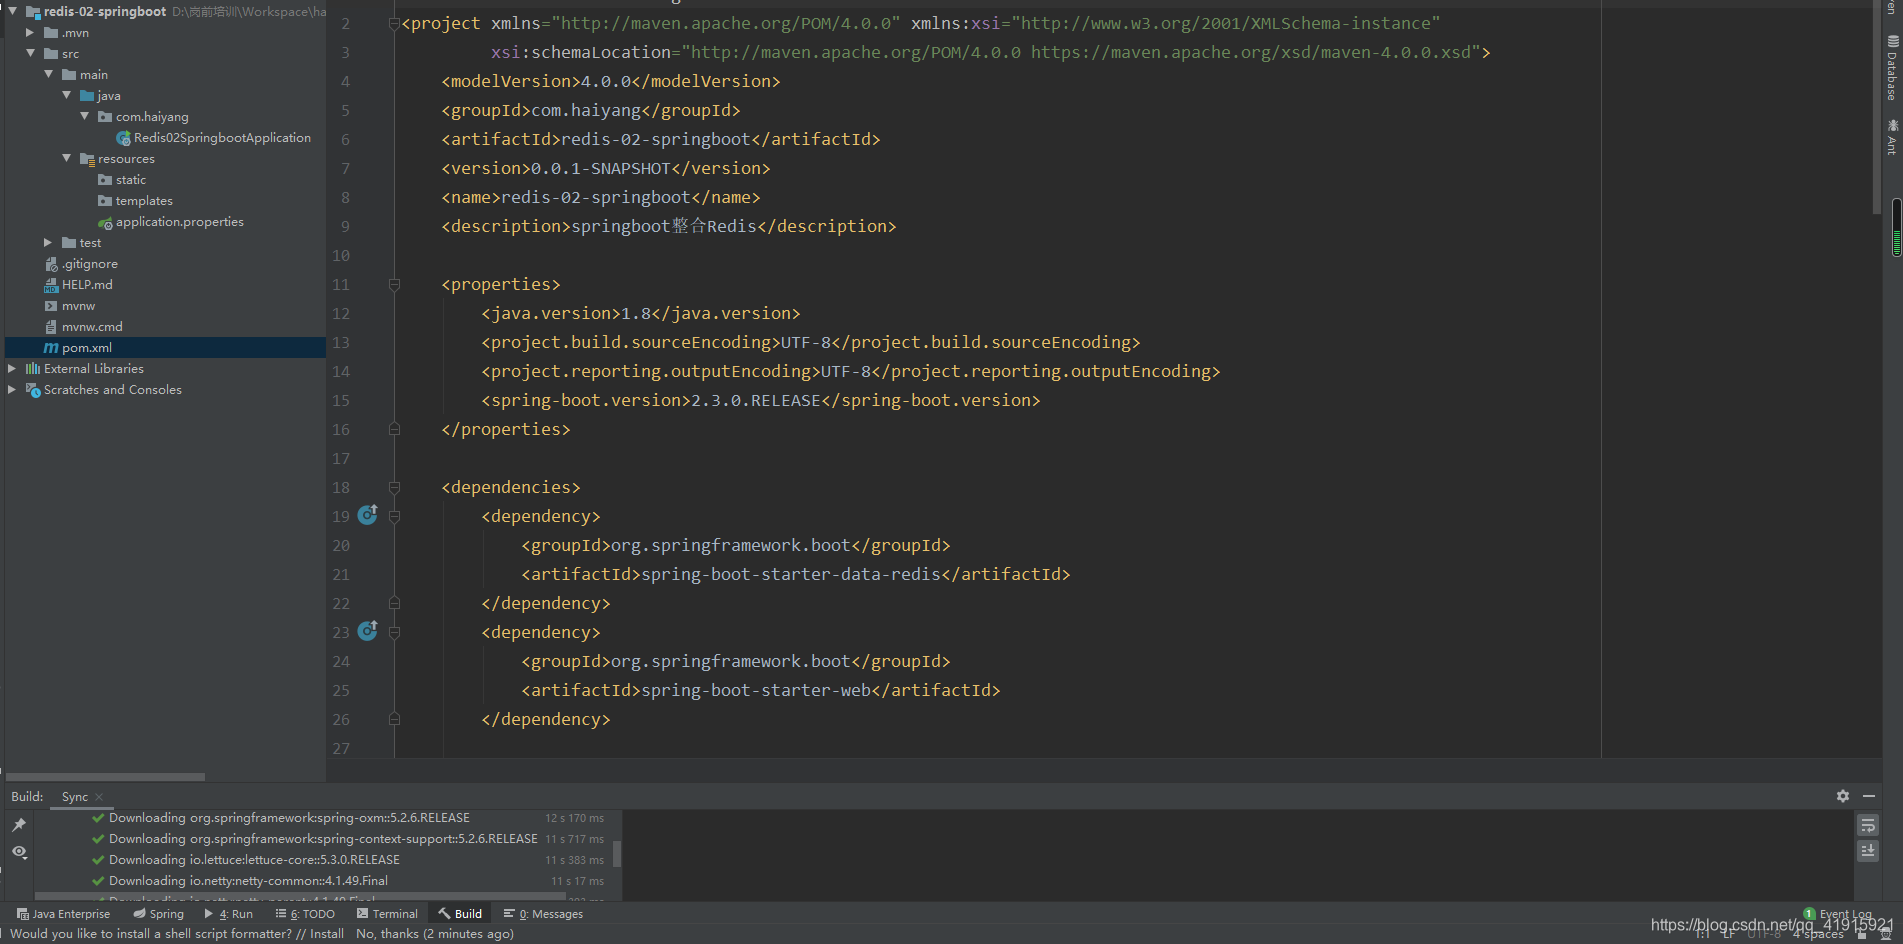
7、点击右下角的 Import Changes,项目结构如下
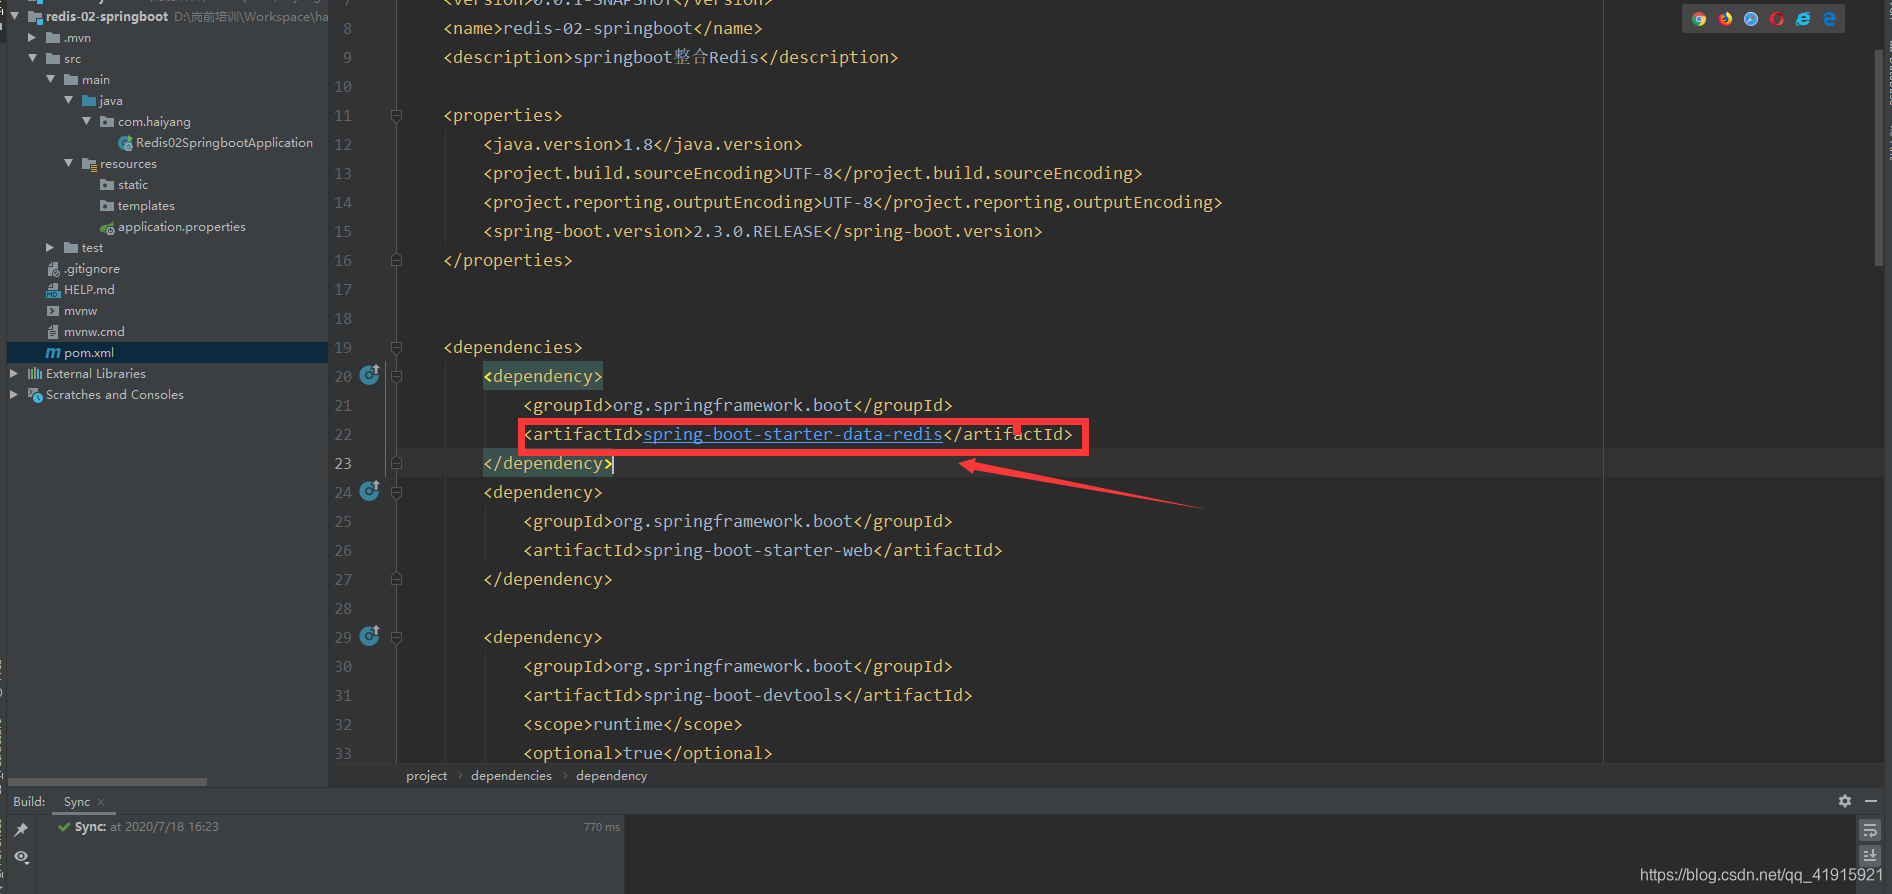
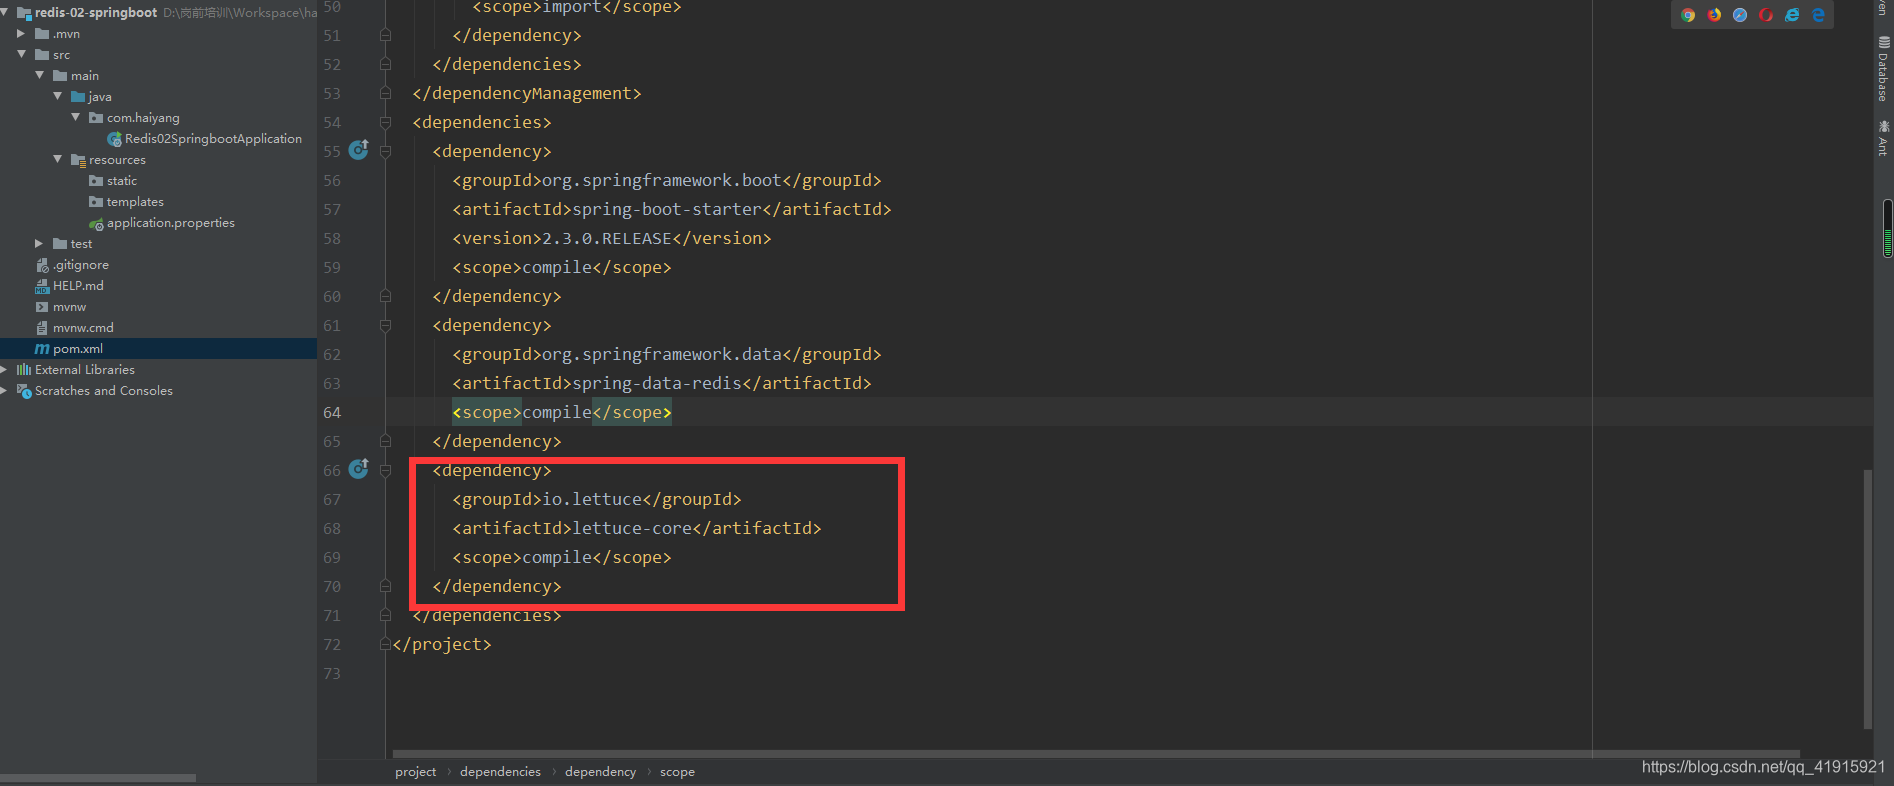
8、我们到pom.xml文件找到spring-boot-starter-data-redis依赖,按住Ctrl+鼠标左键,进入底层源码
9、找到了spring-data-redis依赖,但是却没有Jedis的依赖。
说明:在SpringBoot2.x之后,原来使用的jedis被替换成了lettuce。
为什么要替换?
- jedis:采用的是直连,多个线程操作的话,是不安全的。避免不安全情况,只能采用jedis pool连接池。线程数量多的话,redis-server会变的非常大,类似于BIO(阻塞的)。
- lettuce:采用的是netty,异步请求非常的快,实例可以在多个线程中共享,不存在线程不安全的情况,性能非常的高。类似于NIO(非阻塞的)。
10、源码分析
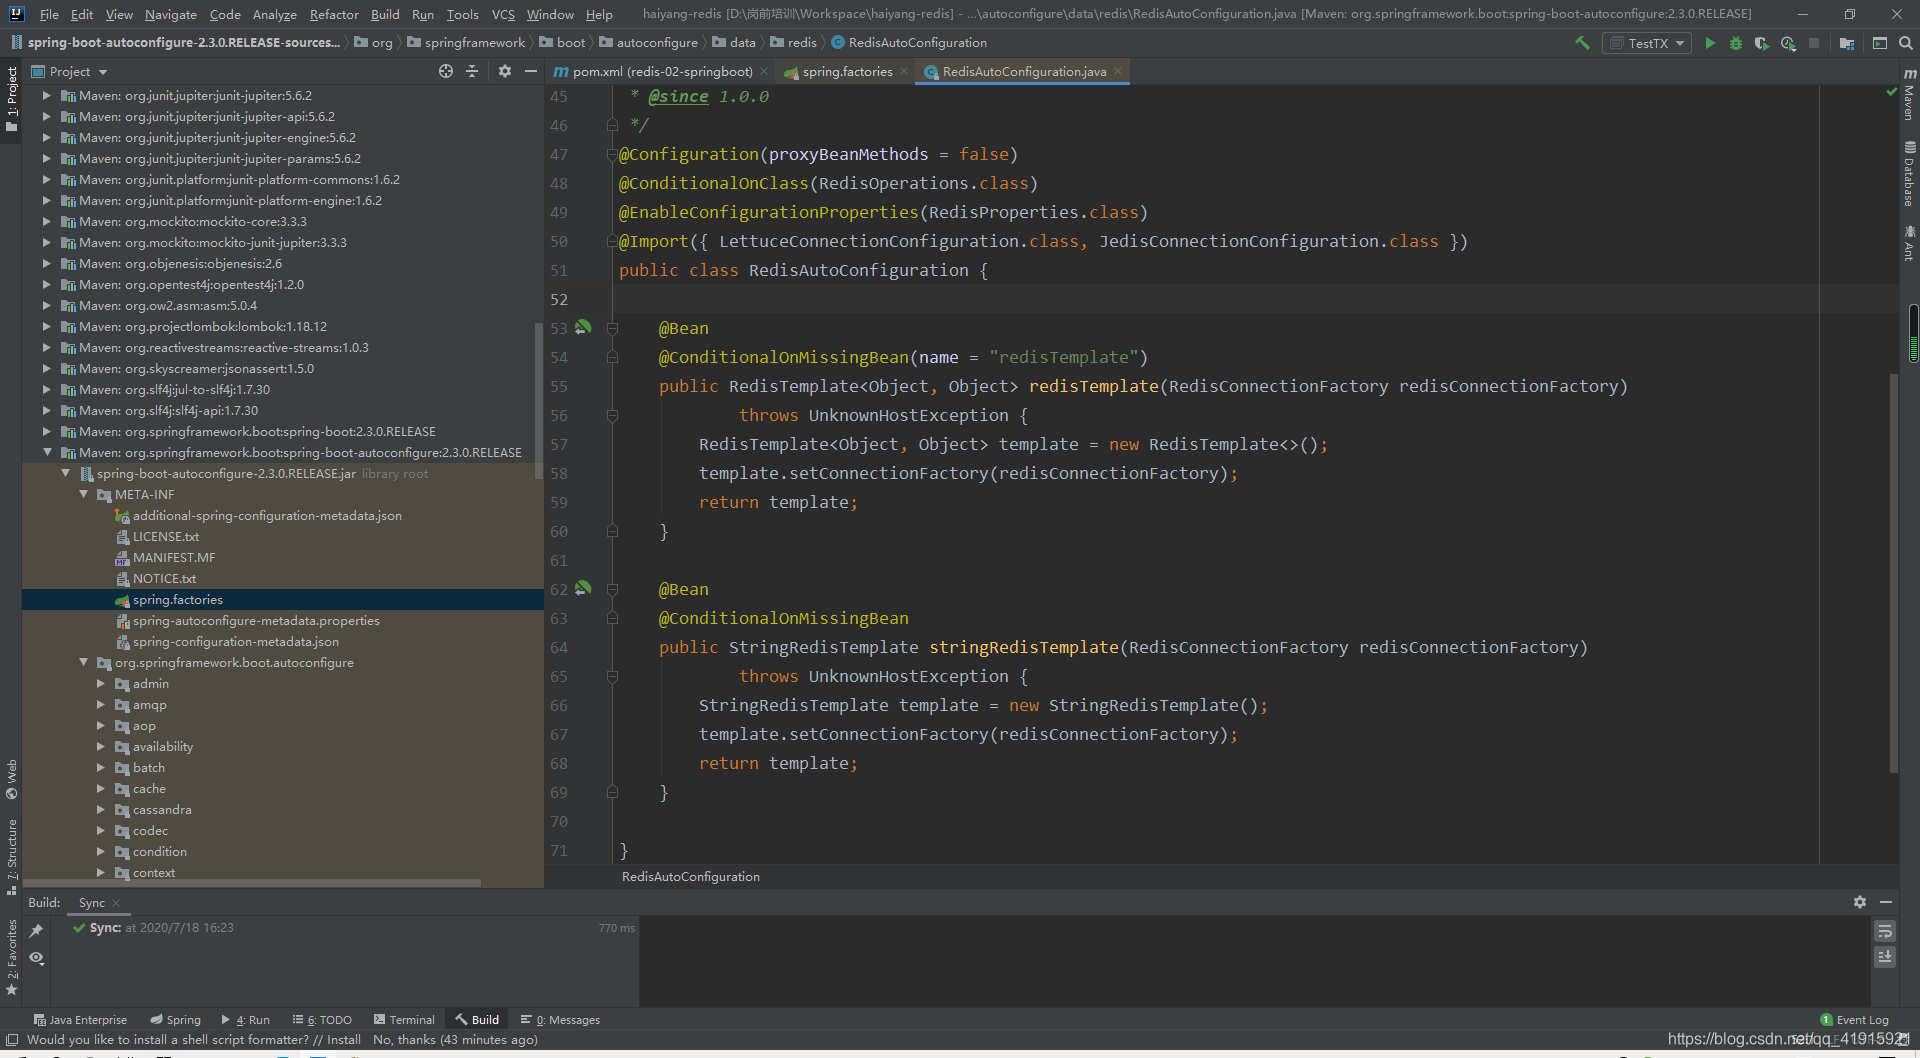
我们找到RedisAutoConfiguration.java
	@Bean
	@ConditionalOnMissingBean(name = "redisTemplate")//我们可以自定义一个RedisTemplate来替换默认的
	public RedisTemplate<Object, Object> redisTemplate(RedisConnectionFactory redisConnectionFactory)
			throws UnknownHostException {
			//默认的RedisTemplate没有过多的设置,  redis 对象都是需要序列化的
			//两个泛型都是Object, Object的类型,我们后期使用需要强制转换<String,Object>
		RedisTemplate<Object, Object> template = new RedisTemplate<>();
		template.setConnectionFactory(redisConnectionFactory);
		return template;
	}

	@Bean
	@ConditionalOnMissingBean//由于String是redis中最常使用的类型,所以单独提出了一个bean!
	public StringRedisTemplate stringRedisTemplate(RedisConnectionFactory redisConnectionFactory)
			throws UnknownHostException {
		StringRedisTemplate template = new StringRedisTemplate();
		template.setConnectionFactory(redisConnectionFactory);
		return template;
	}
11、整合测试
1、导入依赖(在创建项目时,打勾时就已导入) pom.xml
<?xml version="1.0" encoding="UTF-8"?>
<project xmlns="http://maven.apache.org/POM/4.0.0" xmlns:xsi="http://www.w3.org/2001/XMLSchema-instance"
         xsi:schemaLocation="http://maven.apache.org/POM/4.0.0 https://maven.apache.org/xsd/maven-4.0.0.xsd">
    <modelVersion>4.0.0</modelVersion>
    <groupId>com.haiyang</groupId>
    <artifactId>redis-02-springboot</artifactId>
    <version>0.0.1-SNAPSHOT</version>
    <name>redis-02-springboot</name>
    <description>springboot整合Redis</description>

    <properties>
        <java.version>1.8</java.version>
        <project.build.sourceEncoding>UTF-8</project.build.sourceEncoding>
        <project.reporting.outputEncoding>UTF-8</project.reporting.outputEncoding>
        <spring-boot.version>2.3.0.RELEASE</spring-boot.version>
    </properties>


    <dependencies>
        <dependency>
            <groupId>org.springframework.boot</groupId>
            <artifactId>spring-boot-starter-data-redis</artifactId>
        </dependency>
        <dependency>
            <groupId>org.springframework.boot</groupId>
            <artifactId>spring-boot-starter-web</artifactId>
        </dependency>

        <dependency>
            <groupId>org.springframework.boot</groupId>
            <artifactId>spring-boot-devtools</artifactId>
            <scope>runtime</scope>
            <optional>true</optional>
        </dependency>
        <dependency>
            <groupId>org.springframework.boot</groupId>
            <artifactId>spring-boot-configuration-processor</artifactId>
            <optional>true</optional>
        </dependency>
        <dependency>
            <groupId>org.projectlombok</groupId>
            <artifactId>lombok</artifactId>
            <optional>true</optional>
        </dependency>
        <dependency>
            <groupId>org.springframework.boot</groupId>
            <artifactId>spring-boot-starter-test</artifactId>
            <scope>test</scope>
            <exclusions>
                <exclusion>
                    <groupId>org.junit.vintage</groupId>
                    <artifactId>junit-vintage-engine</artifactId>
                </exclusion>
            </exclusions>
        </dependency>
    </dependencies>

    <dependencyManagement>
        <dependencies>
            <dependency>
                <groupId>org.springframework.boot</groupId>
                <artifactId>spring-boot-dependencies</artifactId>
                <version>${spring-boot.version}</version>
                <type>pom</type>
                <scope>import</scope>
            </dependency>
        </dependencies>
    </dependencyManagement>

    <build>
        <plugins>
            <plugin>
                <groupId>org.apache.maven.plugins</groupId>
                <artifactId>maven-compiler-plugin</artifactId>
                <configuration>
                    <source>1.8</source>
                    <target>1.8</target>
                    <encoding>UTF-8</encoding>
                </configuration>
            </plugin>
            <plugin>
                <groupId>org.springframework.boot</groupId>
                <artifactId>spring-boot-maven-plugin</artifactId>
            </plugin>
        </plugins>
    </build>

</project>
2、配置连接 application.properties
#redis如果装在本机的的情况下
#配置redis
spring.redis.host=127.0.0.1
spring.redis.port=6379
3、测试 Redis02SpringbootApplicationTests.java
package com.haiyang;

import org.junit.jupiter.api.Test;
import org.springframework.beans.factory.annotation.Autowired;
import org.springframework.boot.test.context.SpringBootTest;
import org.springframework.data.redis.connection.RedisConnection;
import org.springframework.data.redis.core.RedisTemplate;

@SpringBootTest
class Redis02SpringbootApplicationTests {


    //注入默认的RedisTemplate
    @Autowired
    private RedisTemplate redisTemplate;

    @Test
    void contextLoads() {
        //===============redisTemplate 操作不同的数据类型,api和我们的命令是一样的===========
        //opsForValue 操作字符串 类似于String
        //redisTemplate.opsForValue();
        //opsForList 操作List 类似于List
        //redisTemplate.opsForList();
        //opsForSet 操作Set 类似于Set
        //redisTemplate.opsForSet();
        //opsForHash 操作hash 类似于hash
        //redisTemplate.opsForHash();
        //opsForHyperLogLog 操作HyperLogLog 类似于HyperLogLog
        //redisTemplate.opsForHyperLogLog();
        //opsForZSet 操作ZSet 类似于ZSet
        //redisTemplate.opsForZSet();
        //opsForGeo 操作Geo 类似于Geo
        //redisTemplate.opsForGeo();

        //除了基本的操作,我们常用的方法都可以直接通过redisTemplate操作,比如事务,和基本的CRUD

        //获取redis 的连接对象
//        RedisConnection connection = redisTemplate.getConnectionFactory().getConnection();
//        connection.flushDb();
//        connection.flushAll();
        redisTemplate.opsForValue().set("myKey","haiYang");
        System.out.println(redisTemplate.opsForValue().get("myKey"));

    }

}
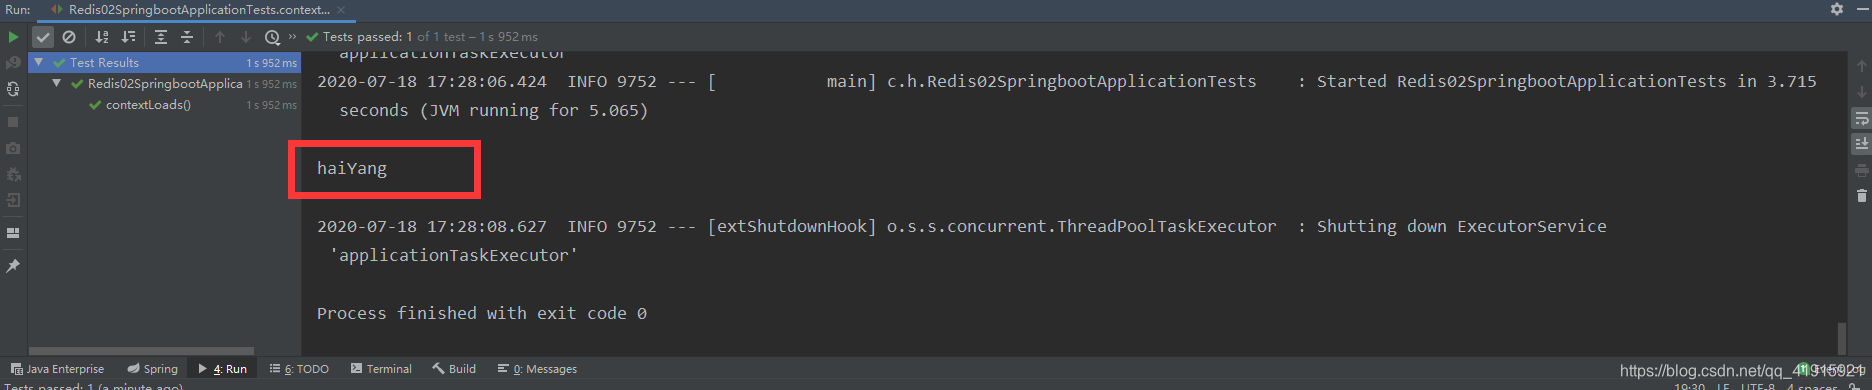
输出:





 扫一扫
扫一扫


 1065
1065

 被折叠的 条评论
为什么被折叠?
被折叠的 条评论
为什么被折叠?
 到【灌水乐园】发言





