Creating an Elementor hosted website is your first step on the road to success. Now it’s time to attach a great name to your beautiful site.
In order to do this, you will first need to make some changes to the DNS records of your domain name. This document will walk you through the steps.
Connect your domain to your Elementor hosted website
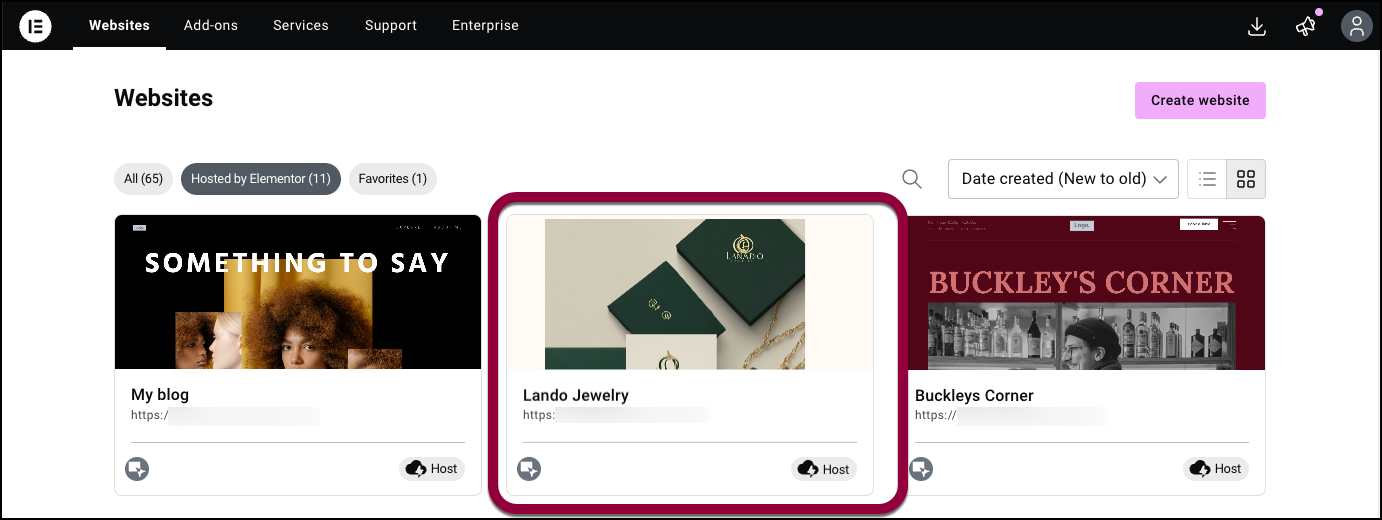
- Go to your My Elementor dashboard.
- Click the website card of the site you want to connect.
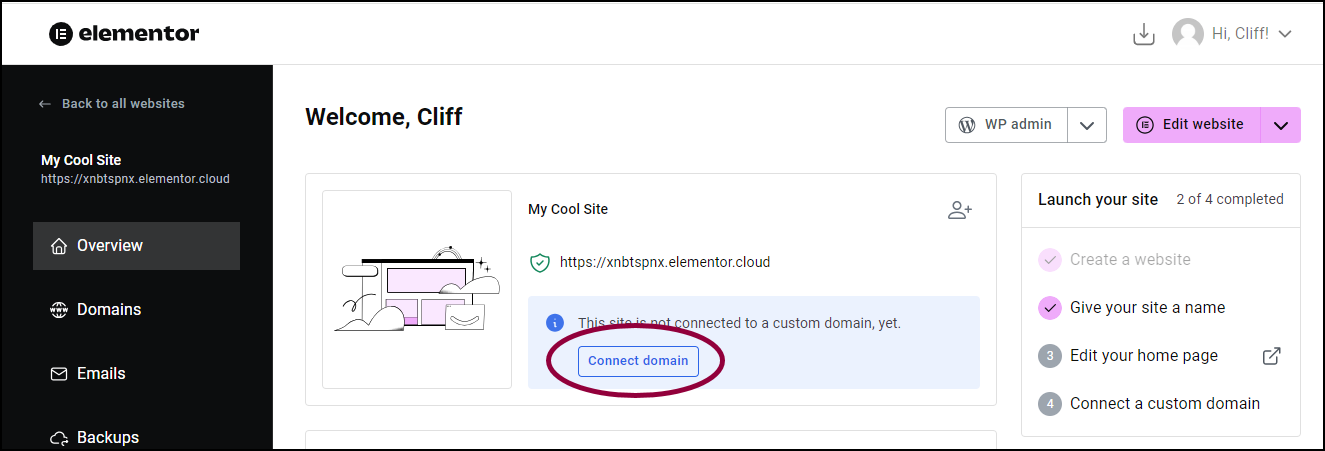
- Click Connect domain.
- In the popup window, enter the custom domain name you purchased and click Let’s begin. Use the domain name without www in front of it.
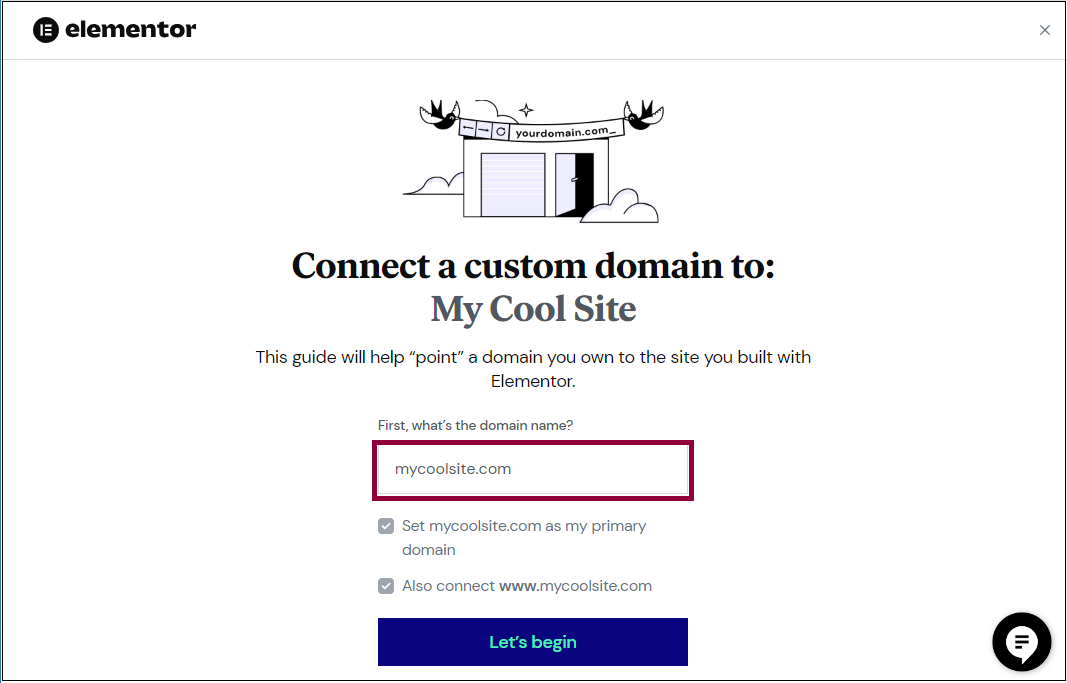
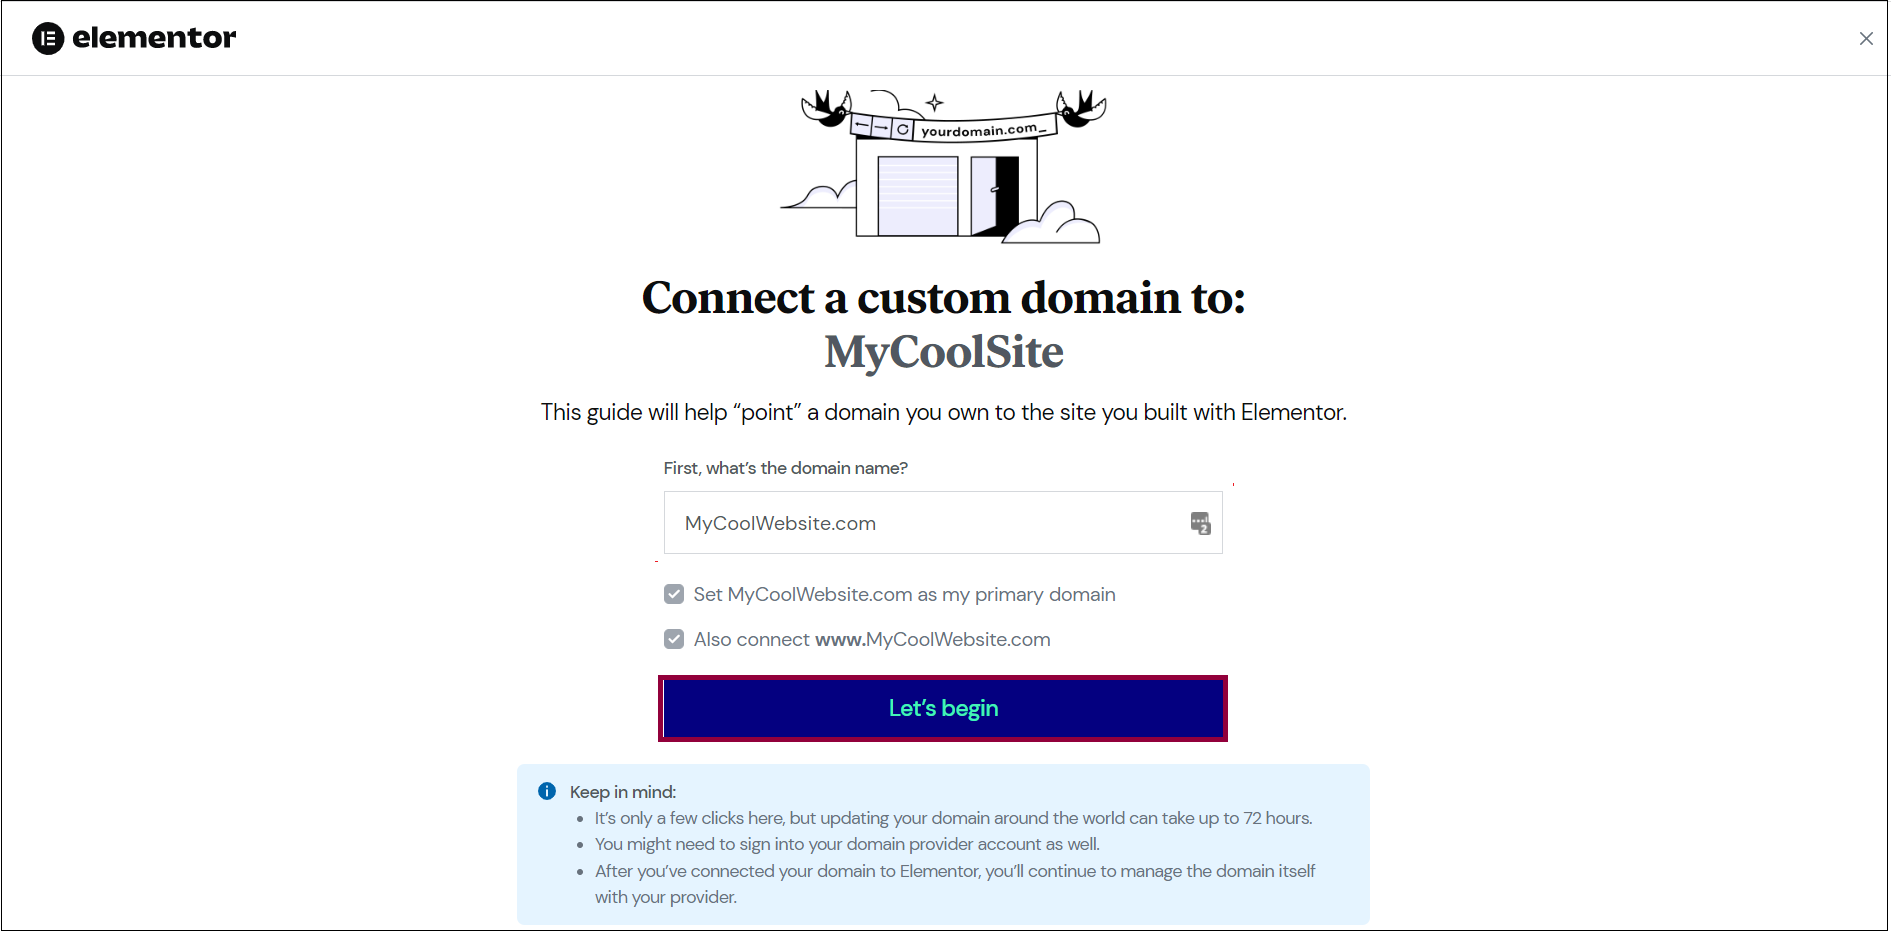
By default, the system uses the name you entered as the primary domain and will connect the name with www in front of it. (e.g. mysite.com will be the primary domain, and www.mysite.com will also be connected.)NoteDomain connection can take up to 48 hours.
Edit the domain name settings with your provider
- If the default checkboxes are okay, click Let’s begin.
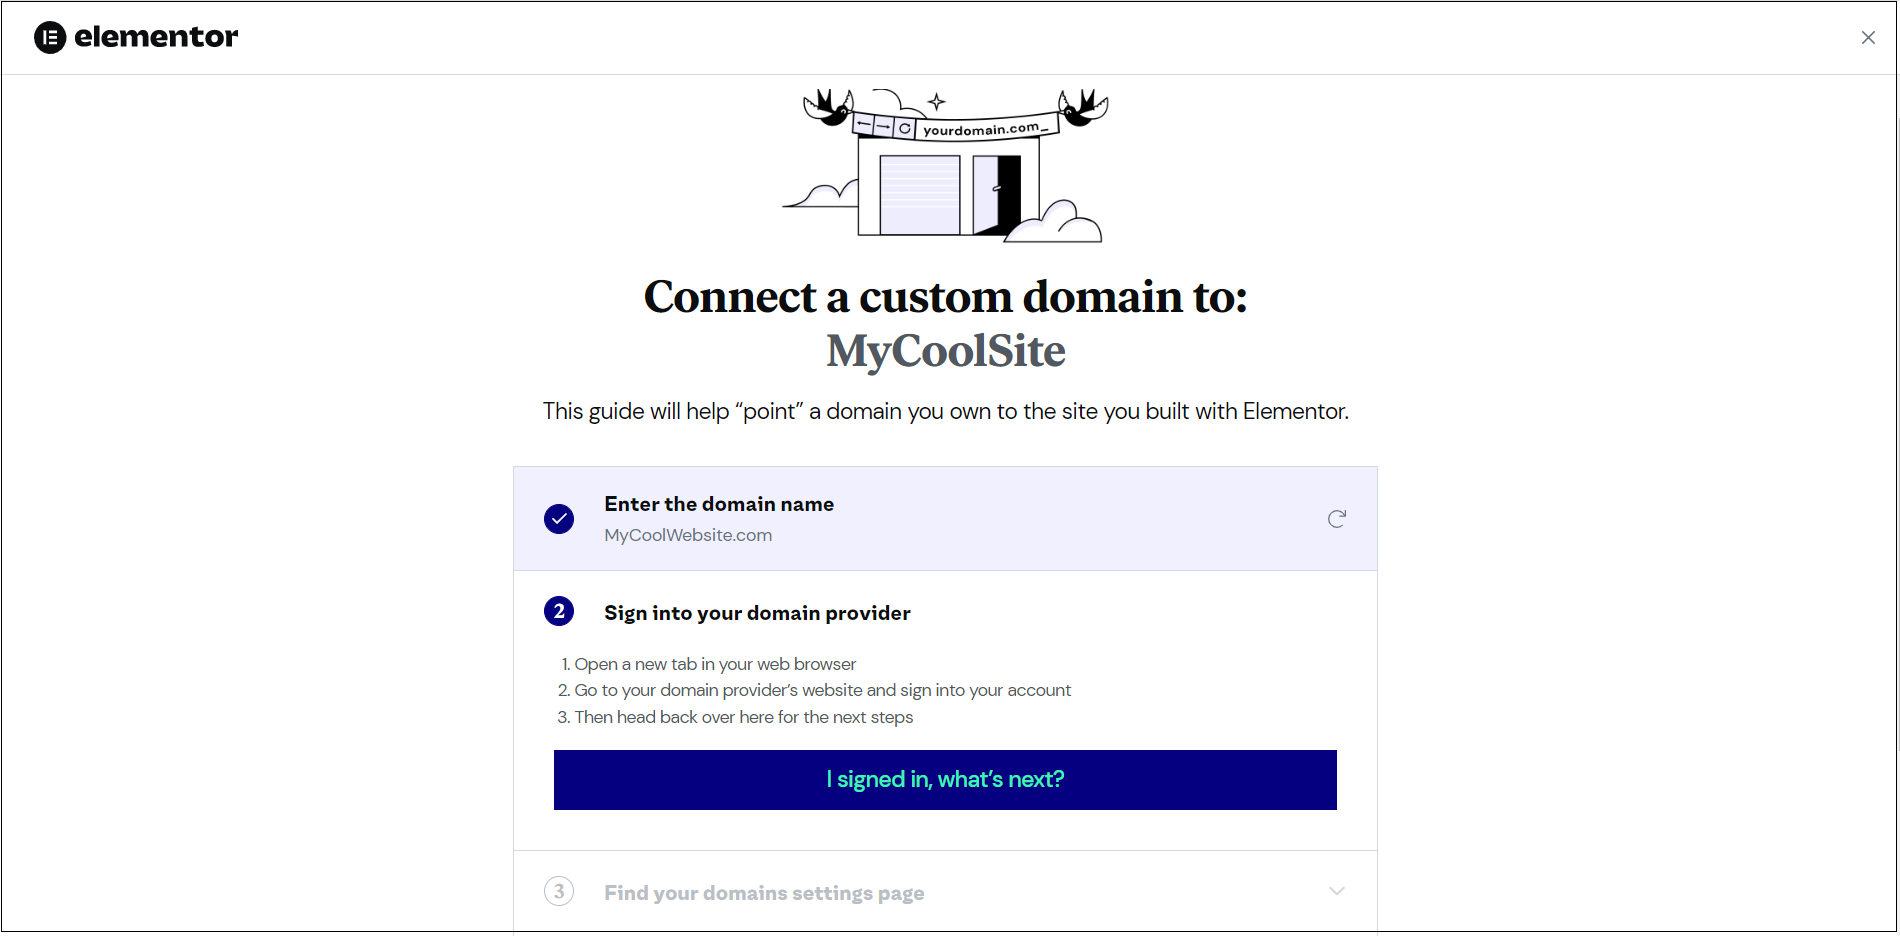
- Open a new tab in your browser, and if you haven’t already, sign into your Hover account.
- Once signed in, go back to the Elementor tab and click I signed in, what’s next?
Add the DNS records
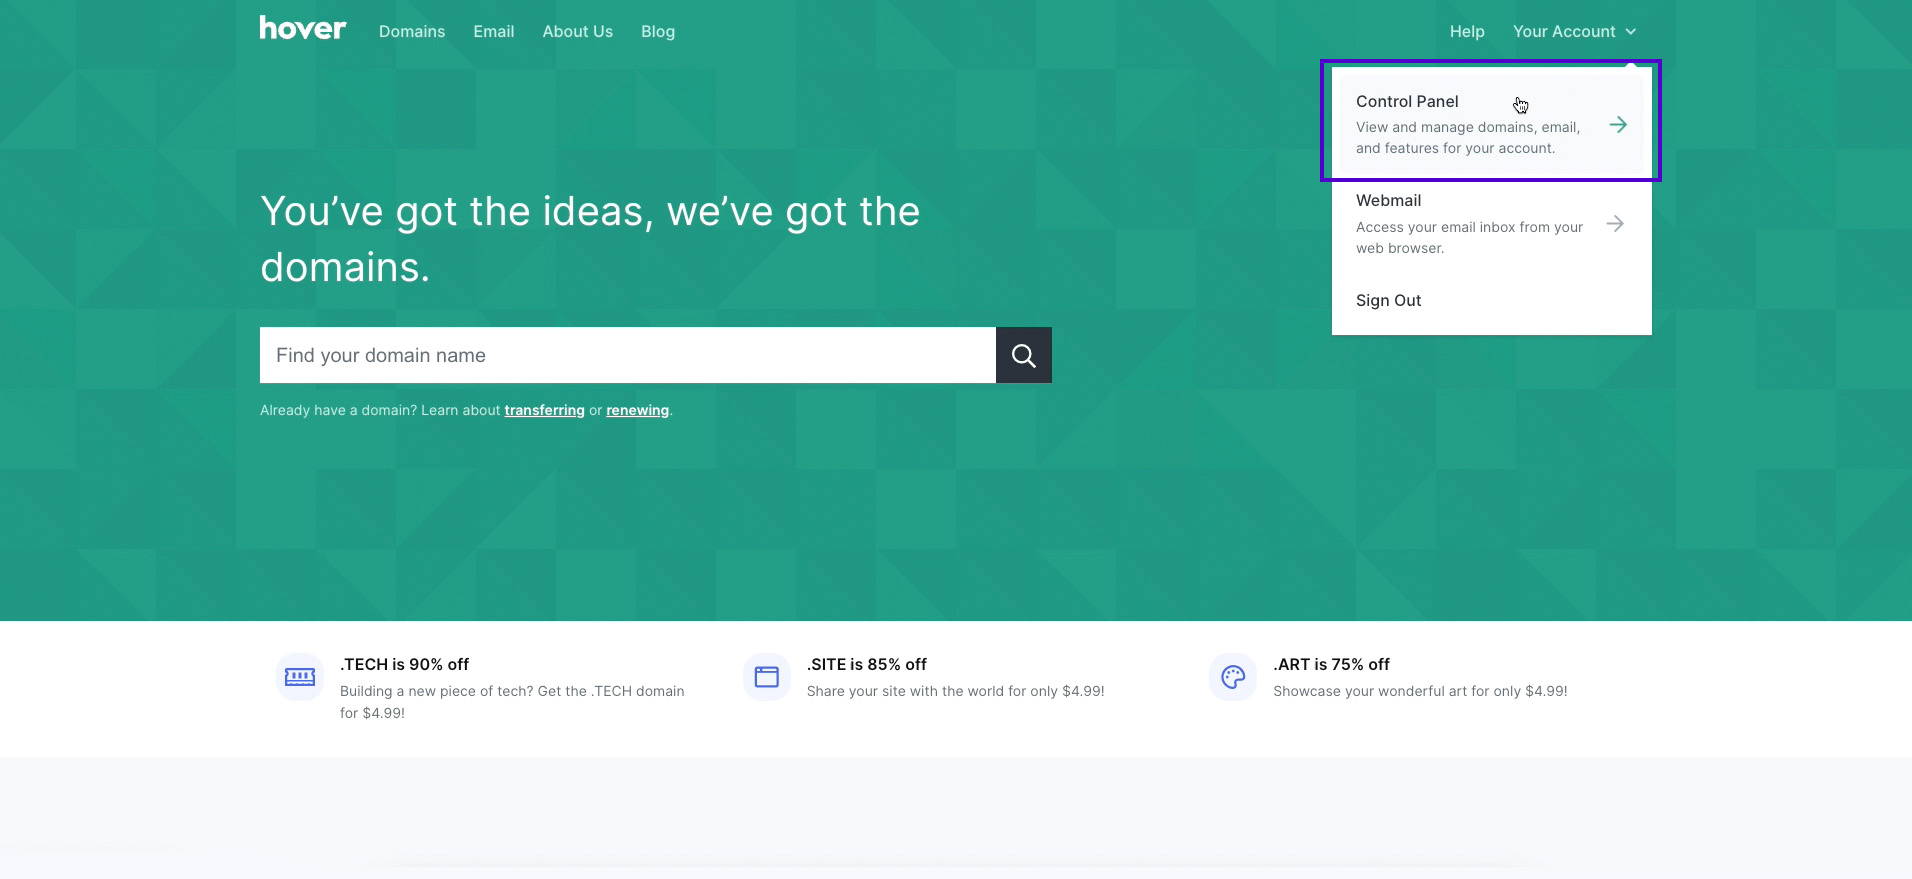
- Switch to the Hover tab and select Control Panel.
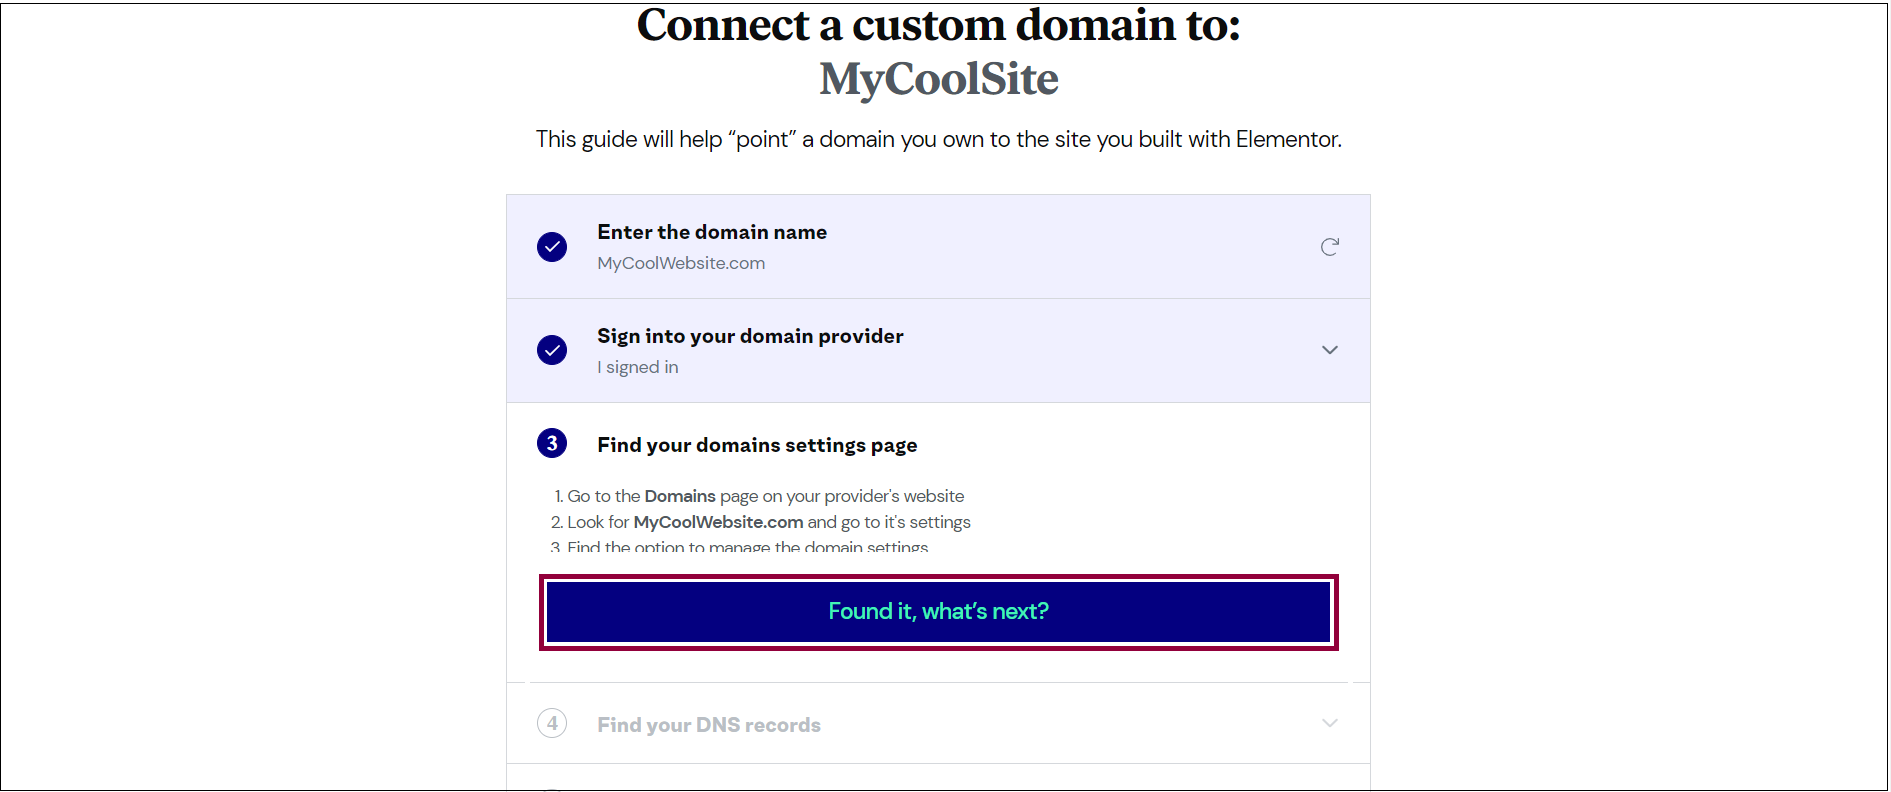
- Make sure your domain is selected.
- Once you’ve found your domain settings, go back to the Elementor tab, and click Found it, what’s next?
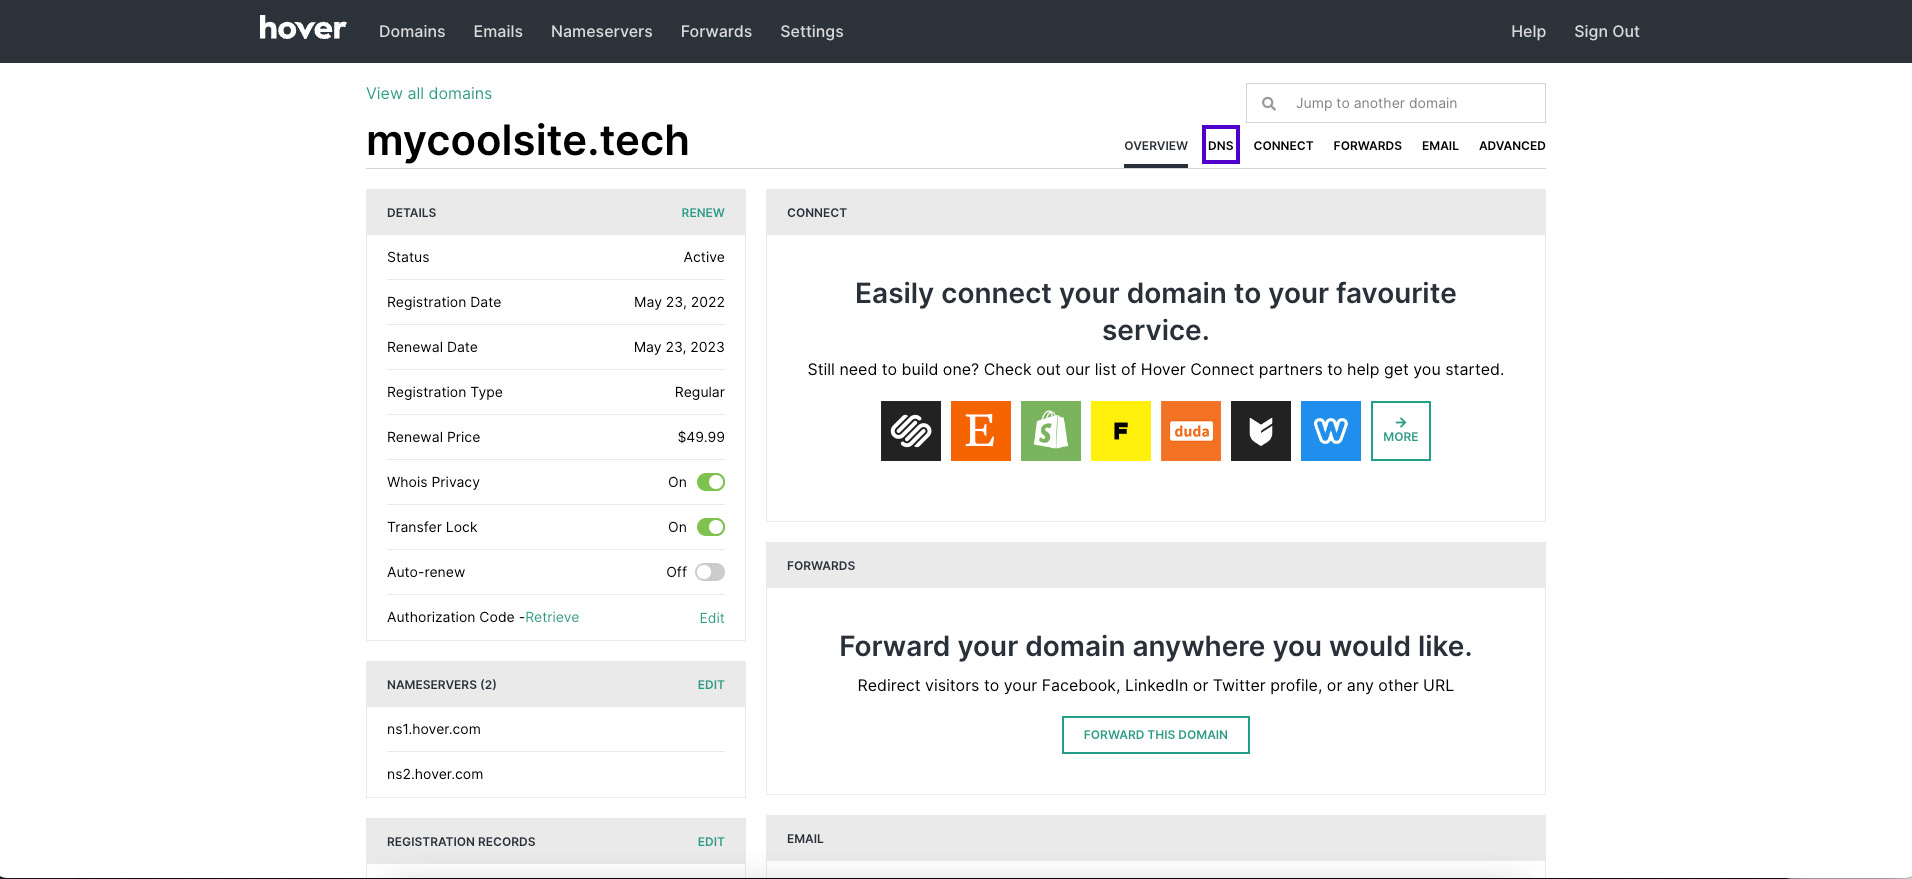
- In the Hover tab, click DNS. This will give you access to the DNS records.
- Once you’ve located the records, go back to the Elementor tab, and click Found them, what’s next?
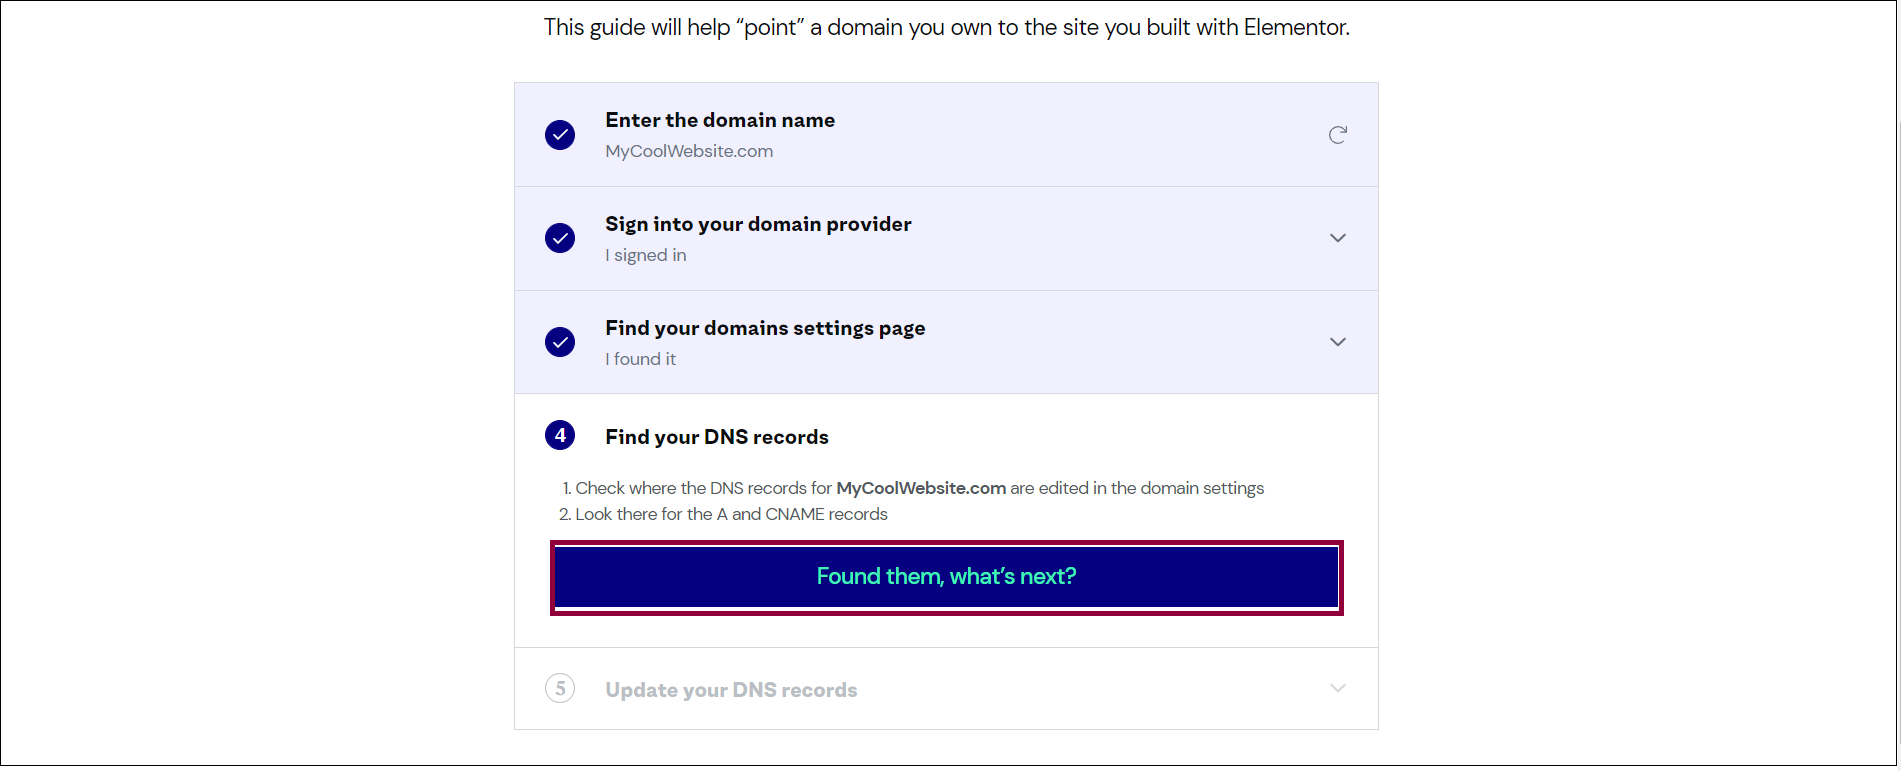
You can now access the A record and CNAME of your Elementor hosted website.
- In the Update your DNS records section, under A record and/or CNAME value, click the copy icon to copy the A record or CNAME from the Elementor tab.

- Go back to the Hover tab and paste in the A record or CNAME as detailed below.
Add an A record
Important: If your domain DNS records have an AAAA (IPv6) record set, you’ll need to delete it because IPv6 isn’t compatible with Elementor hosted websites yet.
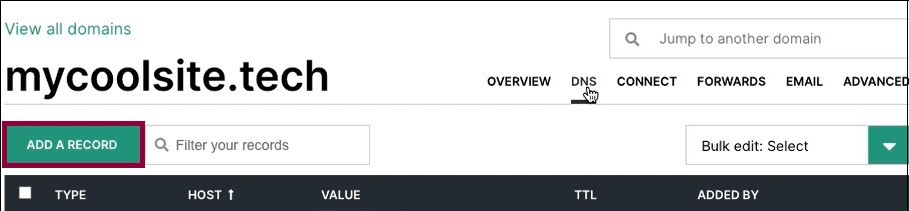
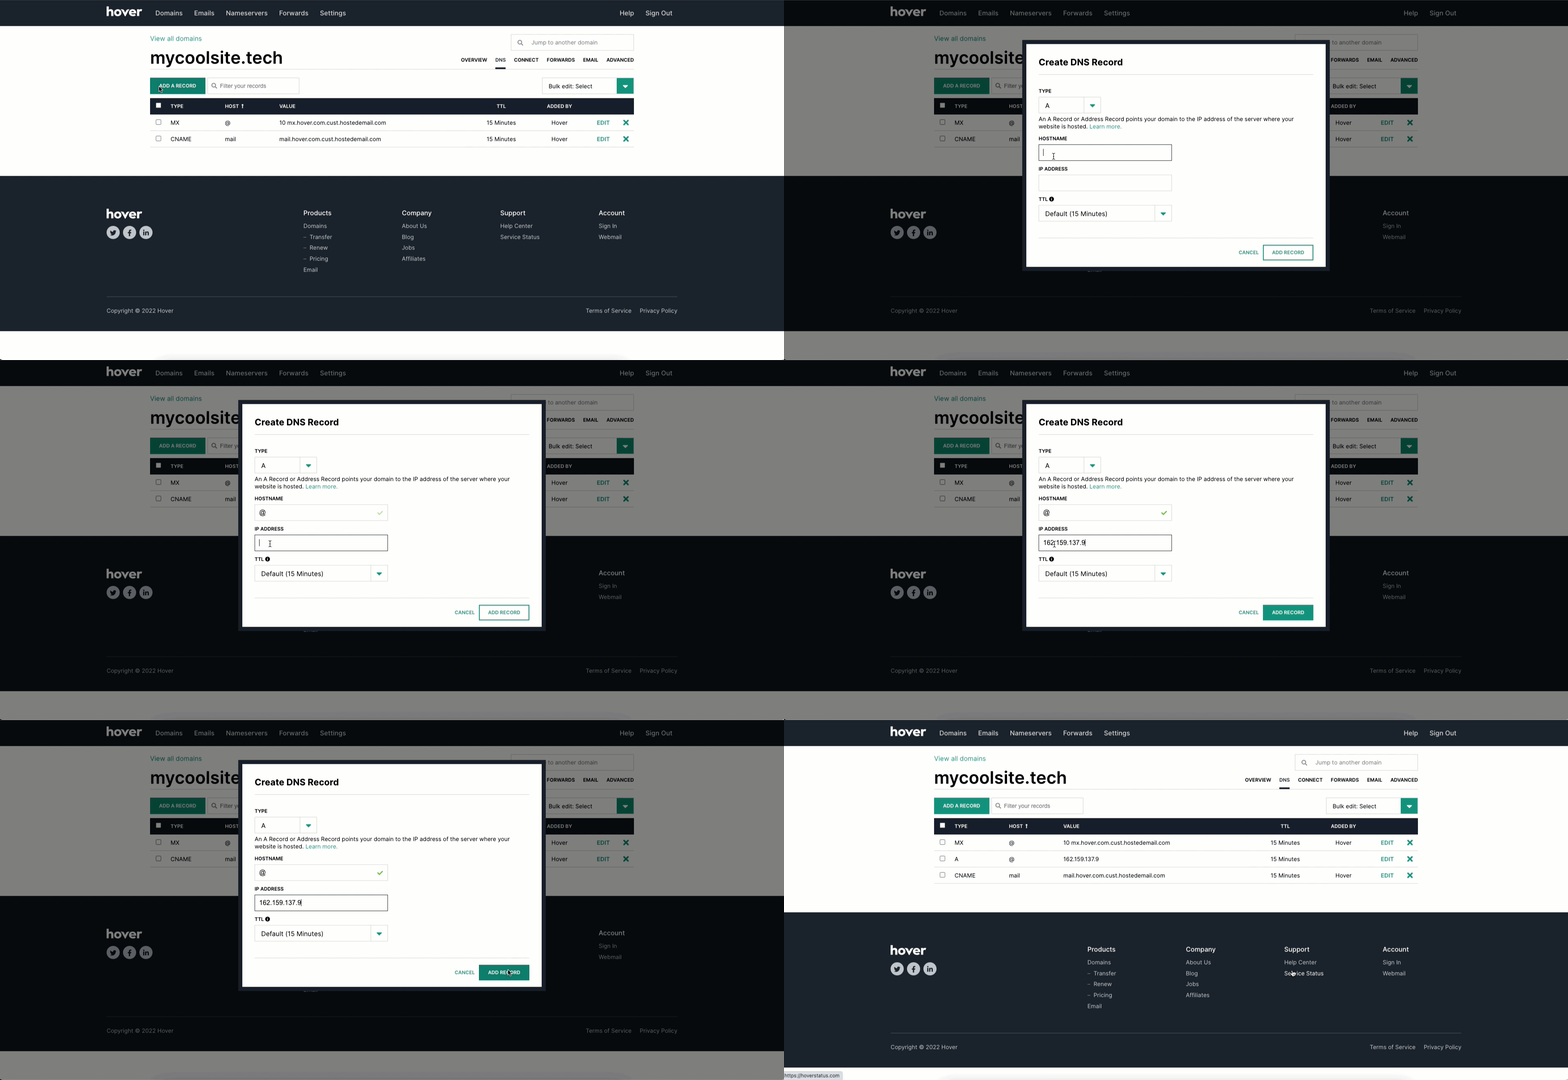
- Click Add A Record.NoteIf the Add A Record button does not work, you may need to contact Hover support
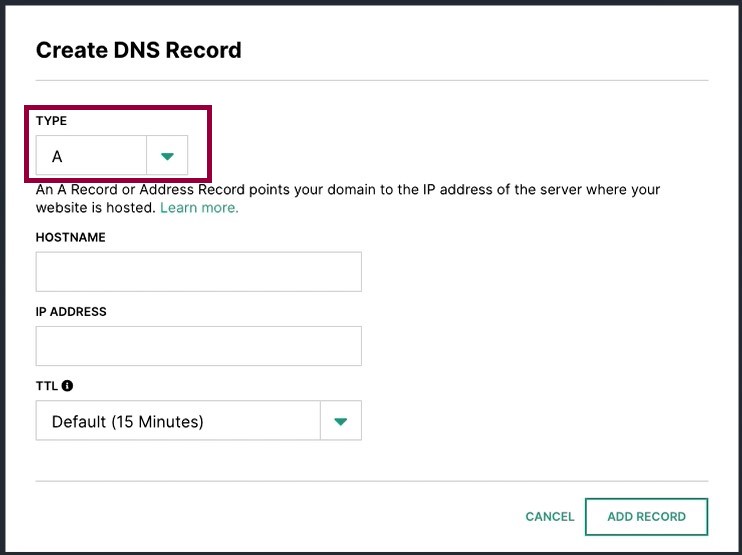
- Use the dropdown in the Type field to select A Record.
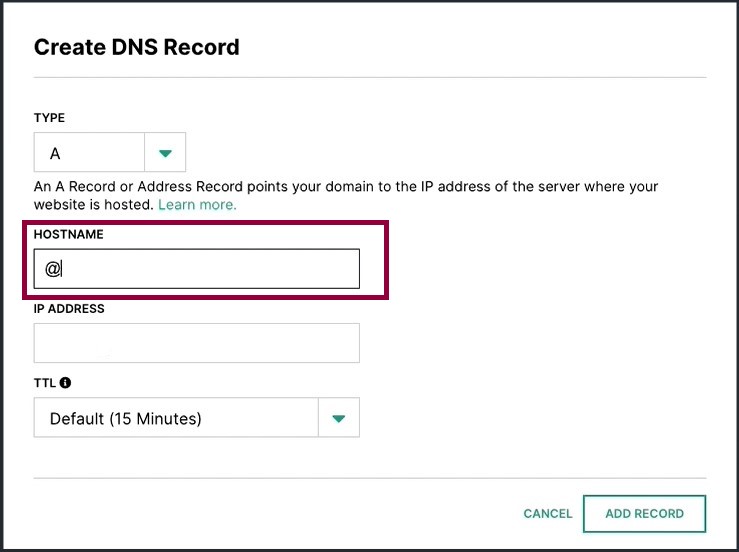
- Enter @ in the Hostname text box.
- In the IP Address field, paste in the A record value of your Elementor hosted website. This is the value you copied from the Elementor tab.
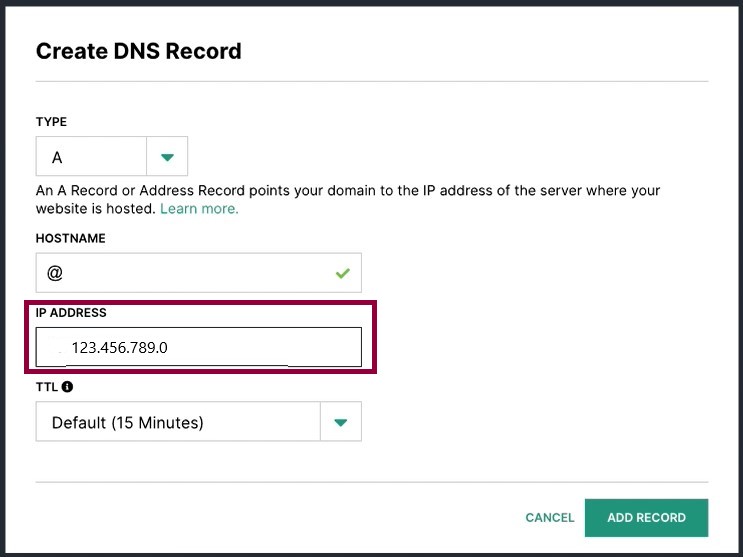
- Leave the TTL field as the default value.
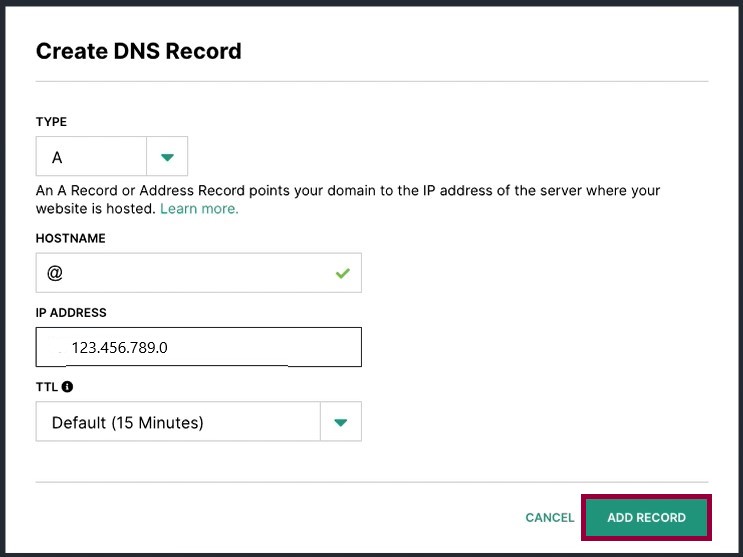
- Click Add Record.
Use a CNAME record for the www address
To direct the “www” address to your Elementor hosted website, you need to create a CNAME record with the host name set to “www”. You may already have a CNAME record for the “www” address set to your domain. If you do, you can leave this as-is. If you don’t have a “www” address in your list, you need to add it from the DNS Management page.
To add a “www” address:
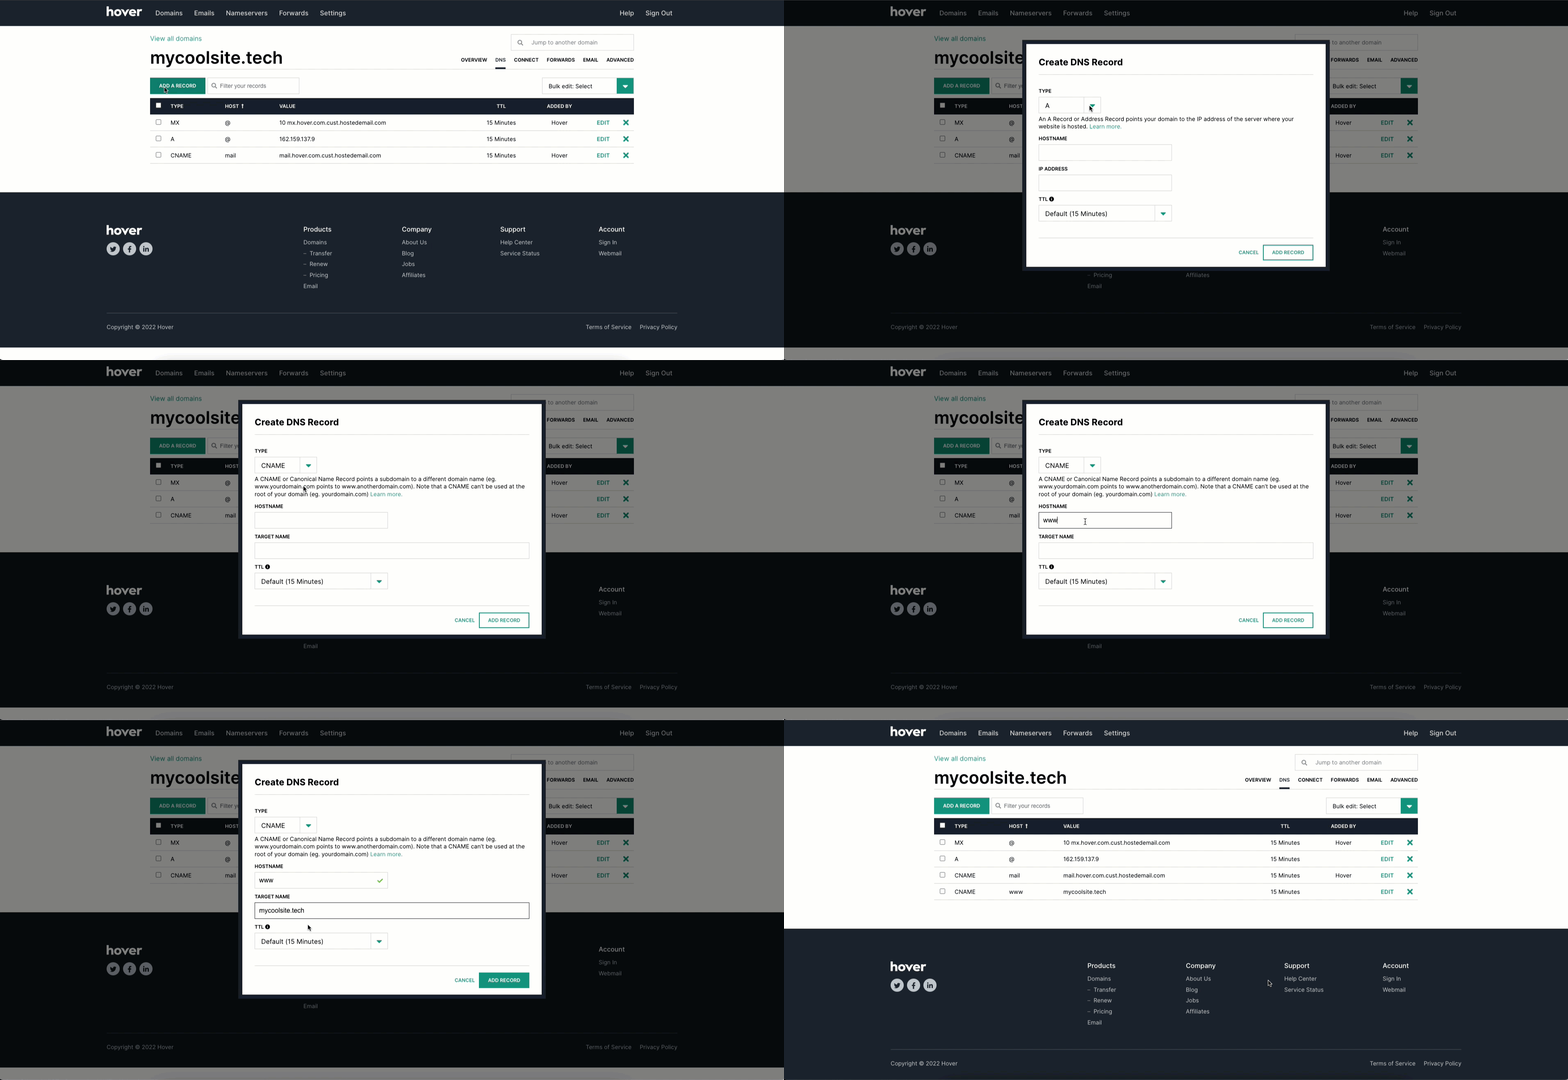
- Click Add A Record.NoteIf the Add A Record button does not work, you may need to contact Hover support
- Use the dropdown in the Type Field to select CNAME.
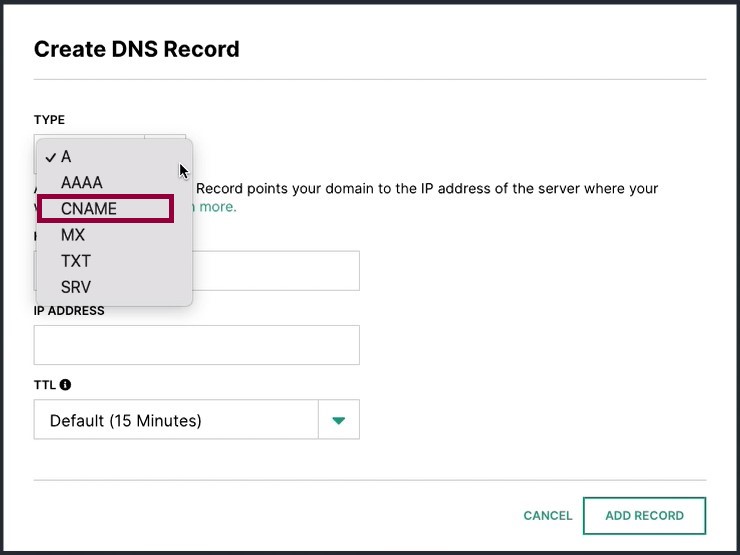
- Enter “www” in the Hostname text box.
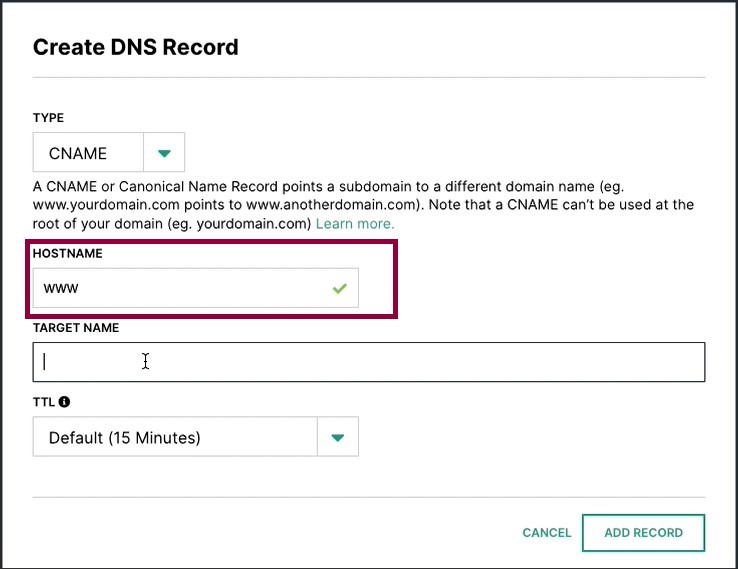
- In the Target Name text box, paste in the CNAME value of your Elementor hosted website. This is the value you copied from the Elementor tab.
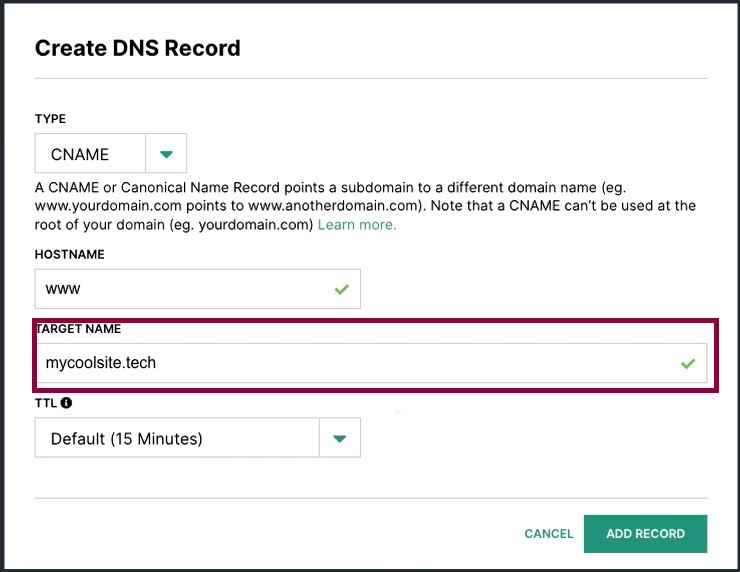
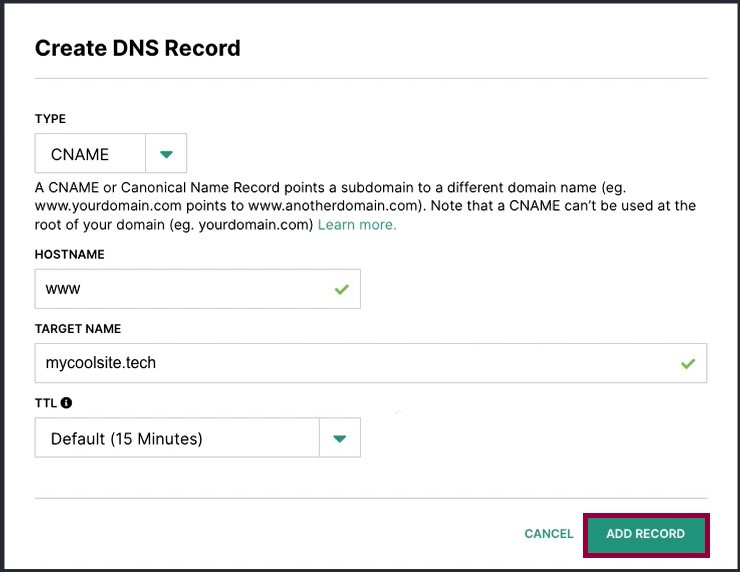
- Leave the TTL field as the default value.
- Click Add Record.
Alternative CNAME method
You can also point your domain to your Elementor hosted account by adding a CNAME record that points your domain to your Elementor hosted website domain. For example, if your domain name is example.com and your Elementor website is example.elementor.cloud, create a CNAME record with example.com that points to example.elementor.cloud.
Finishing up
- Go back to the Elementor tab.
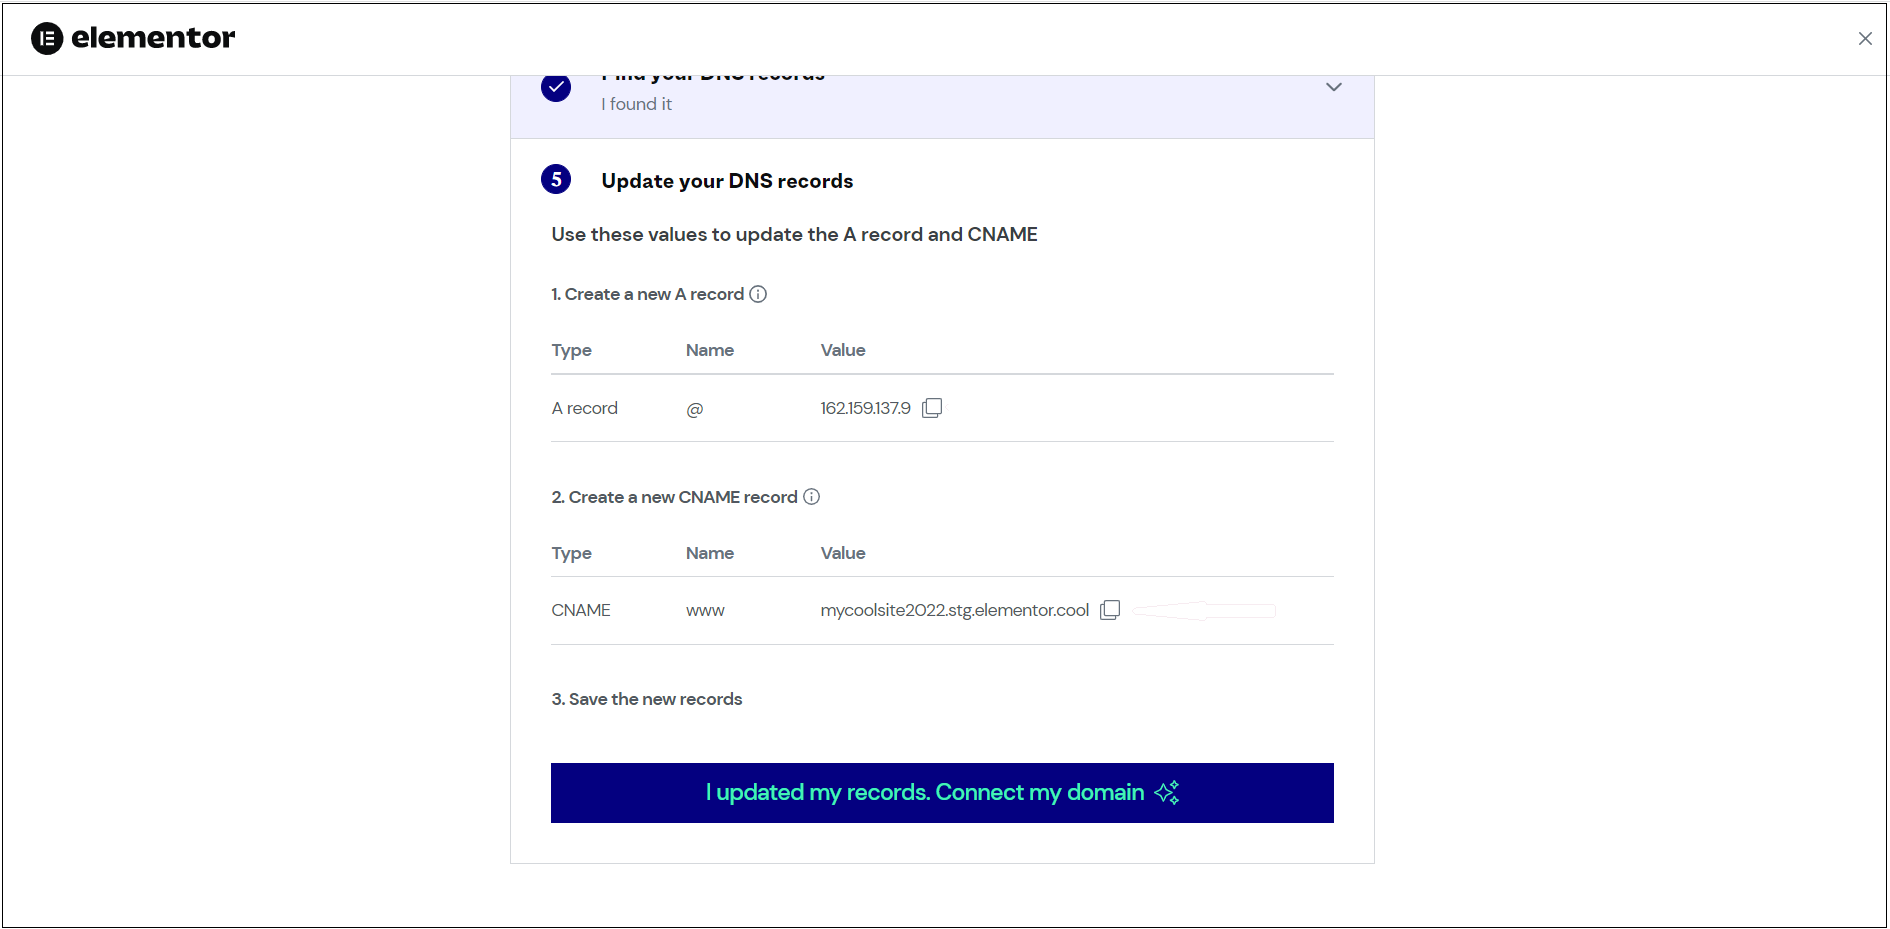
- Click I updated my records. Connect my domain.
So, what’s next?
- Wait for the DNS changes to propagate (this can take up to 48 hours).
- We’ll issue an SSL certificate for your website.
- When your domain is ready, we’ll notify you by email.
