It allows developers to quickly build modern and responsive user interfaces using utility-first CSS classes. It integrates seamlessly with Next.js to provide fast styling and efficient development.
- Utility-First Styling: Tailwind provides pre-built utility classes to style components directly in HTML or JSX.
- Easy Integration: Can be installed and configured easily within a Next.js project.
- Improved Development Speed: Helps create responsive and customizable UI designs faster.
Steps to Install & Setup Tailwind CSS
Prerequisite: Before installing Tailwind CSS, make sure you have already created a Next.js project. If you haven't created one yet, refer to the Next.js Create Next App article. You should also have Node.js and npm installed on your system.
Step 1: Create a new Next Project
Create a new Next application using the command below.
npx create-next-app@latest my-next-app
cd my-next-app
Step 2: Install Tailwind
After creating your Next.js project, navigate to the project’s root directory and install the Tailwind CSS dependencies using the following command.
npm install tailwindcss @tailwindcss/postcss postcssStep 3: Configure PostCSS
After installing Tailwind CSS, configure PostCSS by opening the postcss.config.mjs file in the project root and adding the Tailwind CSS PostCSS plugin.
const config = {
  plugins: {
    "@tailwindcss/postcss": {},
  },
};
export default config;
Project Structure:
Following is the project structure after installing tailwind CSS.
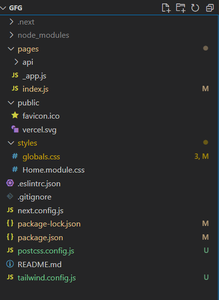
- .next/ : Generated build output by Next.js.
- node_modules/ : Installed project dependencies.
- public/ : Stores static assets such as images and icons.
- src/app/ : Contains App Router files including page.js, layout.js, and globals.css.
- postcss.config.mjs : PostCSS configuration for Tailwind CSS.
- next.config.ts : Next.js configuration file.
- package.json / package-lock.json : Project metadata and dependencies.
- README.md : Project documentation.
Step 4: Add Tailwind CSS to Your Project
In src/app/globals.css file and import Tailwind CSS using the following statement.
@import "tailwindcss";Step 5: Testing Tailwind CSS
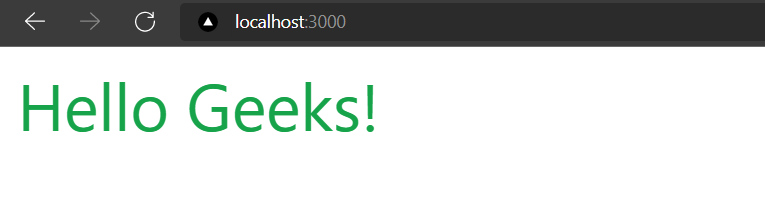
In the src/app/page.js file and replace the default code with the following to test whether Tailwind CSS is working correctly.
export default function Home() {
  return (
    <div className="p-2 text-3xl text-green-600">
      Hello Geeks!
    </div>
  );
}
Run our next application using the following command.
npm run devOutput: